
Do you love to have beautiful and meaningful art hanging up in your home? Learn how to make your own church hymn wall art, basically for free! Use an old song book and a printer to create a gorgeous piece of art.

I have several of these beautiful pieces throughout my home. Not only do I love that they are aesthetically pleasing, but I love it is also meaningful. One of my favorite things about making this is that I can customize it. I get to choose what song, what font, and what type of wreath I want around the words.
It can be a conversation starter for those you have in your home.
It can also be a great gift to give someone as a new home owner or for birthdays and at Christmas.
I find myself singing or humming these songs around my home. It’s a great way to keep worship songs in the forefront of your mind.

Supplies you need:
Old song book
Free Wreath Clipart from foxandhazel.com
PowerPoint
How to make your own wall art
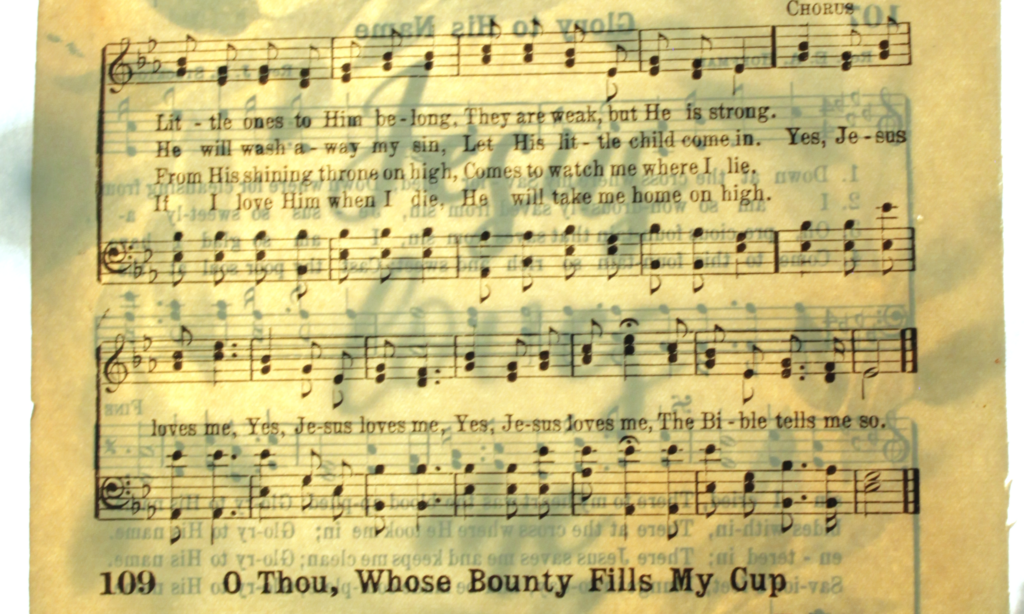
Find the song.
First, look through your Hymn book and find the song you want to use. It better to have one that uses an entire page, but I have used some that share a page with another song, and it looks great too. I will show you one like this today.

Cut out the song page.
Once you have found the song you want to use, take your box cutter and gently cut the page out as close tot he binding as you can. You might cut through to the next page, but I didn’t have an issue with that because I planned to use multiple pages from the book to make more.
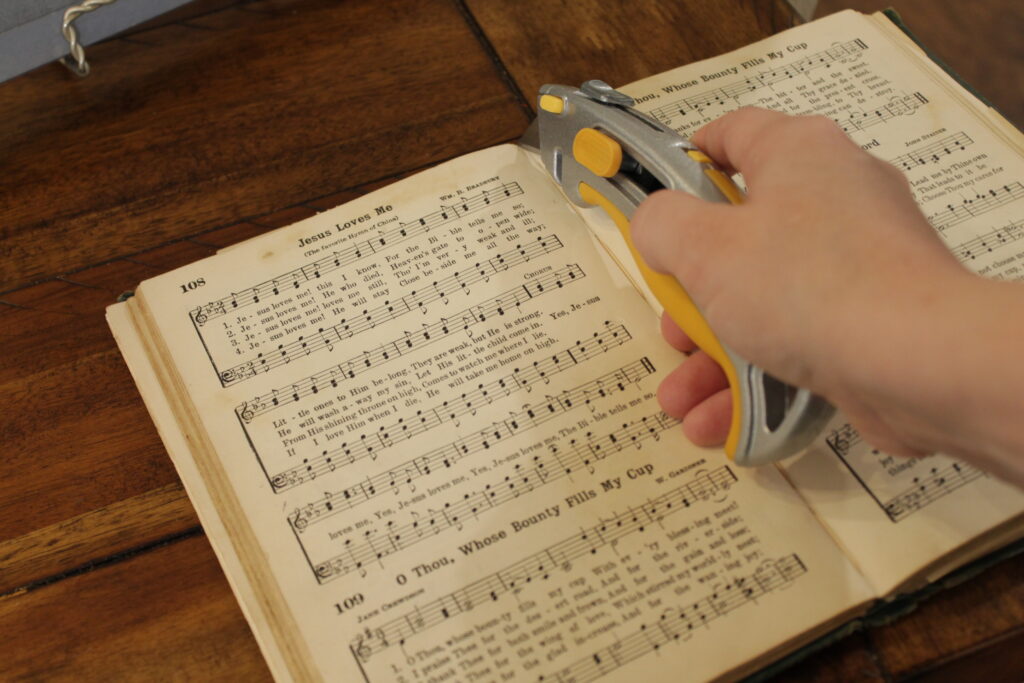
After your page is cut, remove the page and if you have and jagged edges, cut them off so they don’t get caught in the printer.

Create your hymn art design
Now you will set the page aside for now and open up powerpoint on your computer. Adjust the “page set up” under the file tab and make it vertical.
Go ahead and download the free wreath clip art, if you haven’t already. Choose a style you like and insert it into powerpoint. Insert a text box and type the font that you want to show up on your hymn wall art.
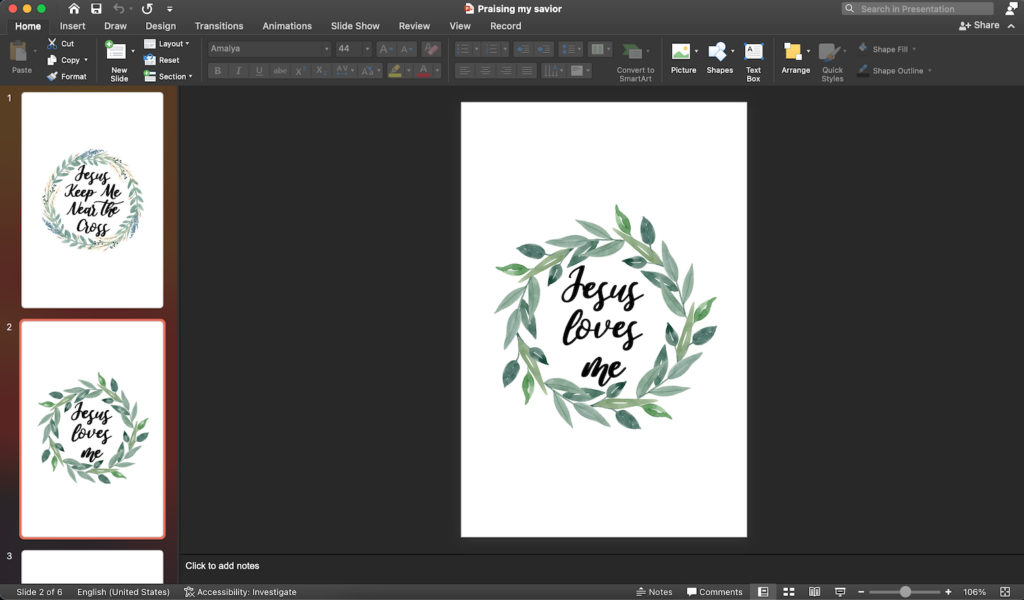
At this point you will want to just estimate the sizing of everything based on how large your hymn paper is. (We will adjust this in a minute.)
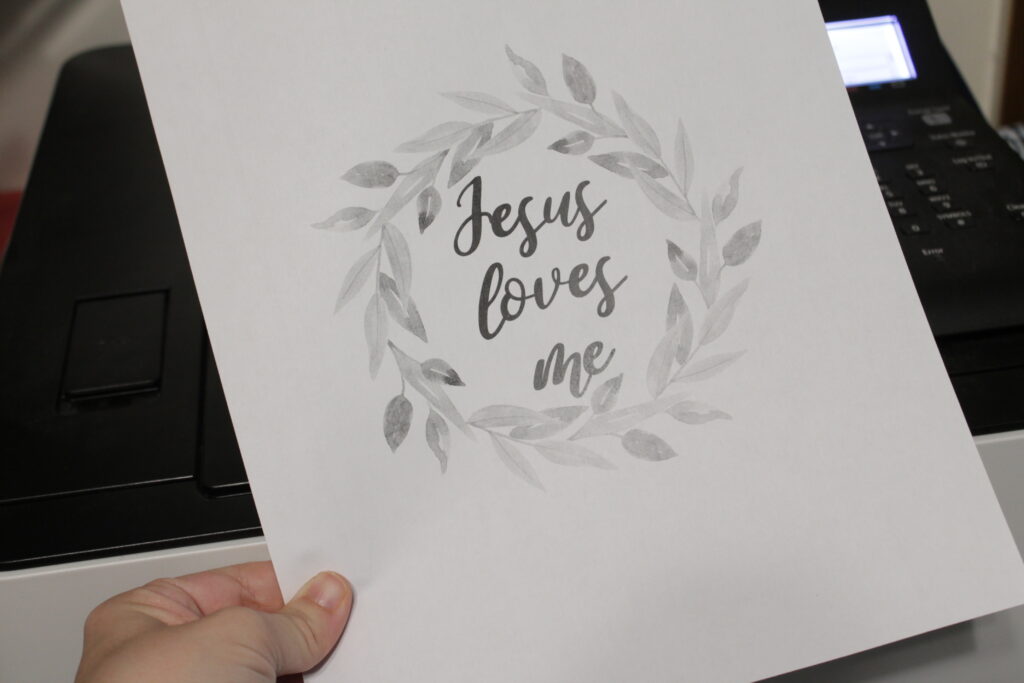
Print your test page of the hymn art.
When you have your design the way you like and it and think you have you sizing close, go ahead and print the page in black and white on plain paper. This is the test page.
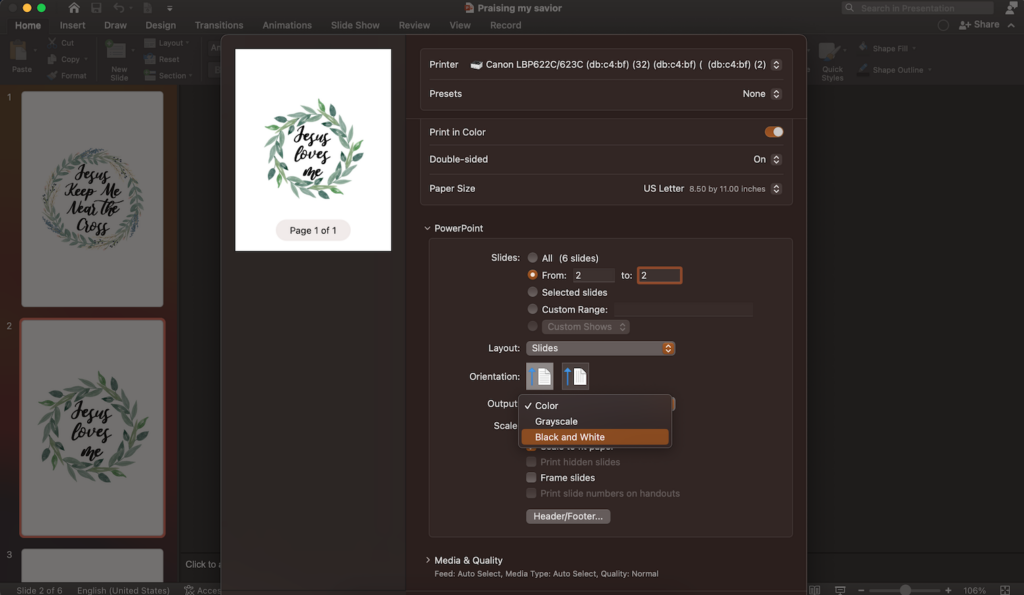
Grab the test page off of the printer. Choosing to print in black and white will save your color ink. Especially if you have to print multiple test pages, which is highly likely. I had to test several times.
Make adjustments.
Using your test page, take your hymn paper that you cut out of the hymn book and line it up over the top to see how your design fits onto the page.

The easiest way to do this is to either hold your paper up to the window or over the top of a lamp so that you can see the hymn art through the hymn paper.
If it does not line up the way that you want, head back to Powerpoint and make adjustments accordingly. Size up or size down. Repeat the black and white test page process until you have it just right.

Attach the hymn paper.
Now it’s time to attach the hymn paper to the final test page. You will want to use reposition-able tape. Roll a small amount and the top and bottom of the paper. You only need enough to make the paper stick to the test page so that it will go through the printer.
You may need to head back to the window to be sure you have things all lined up before printing.

If you don’t already know which way to put your paper in so that it will print on the correct side in the correct orientation. Be sure to figure this out before inserting your hymn paper.
After you are certain of how to place your paper in your printer, go ahead and put it in there.
This part always makes me so nervous. Even though I check and double check and even triple check, I always doubt myself and fear that I put it in wrong.

It’s time to print!
Make sure that you select to print it in color this time.
Wait patiently as it runs through the printer.

Now jump for joy because not only did it work, but now you have a beautiful piece of art to hang up in your home!

It is just so exciting when a project turns out exactly how you envisioned!
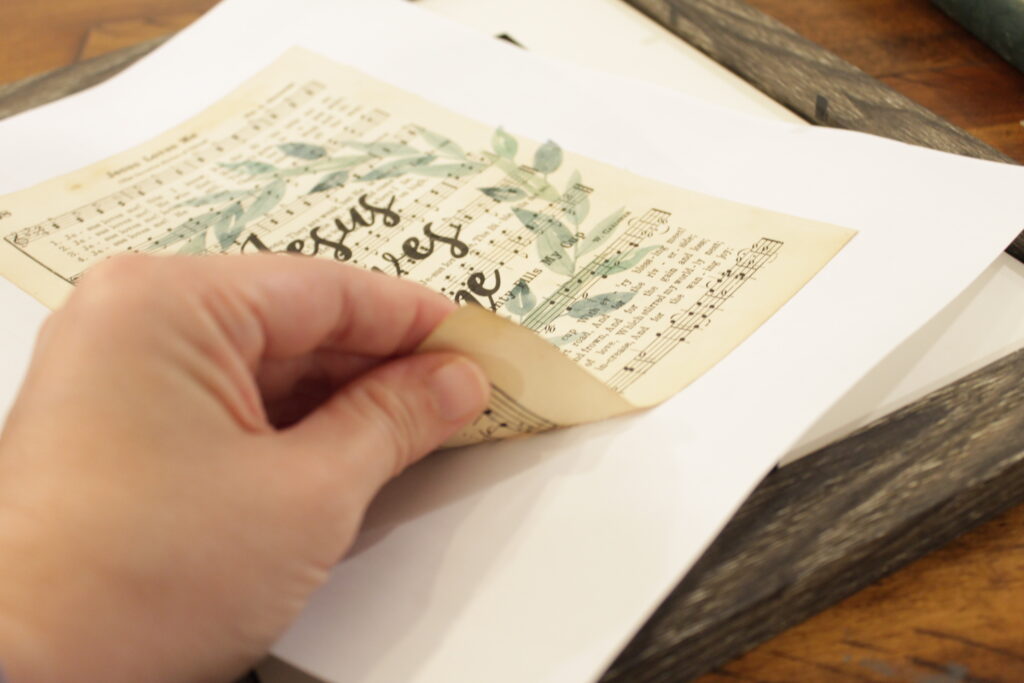
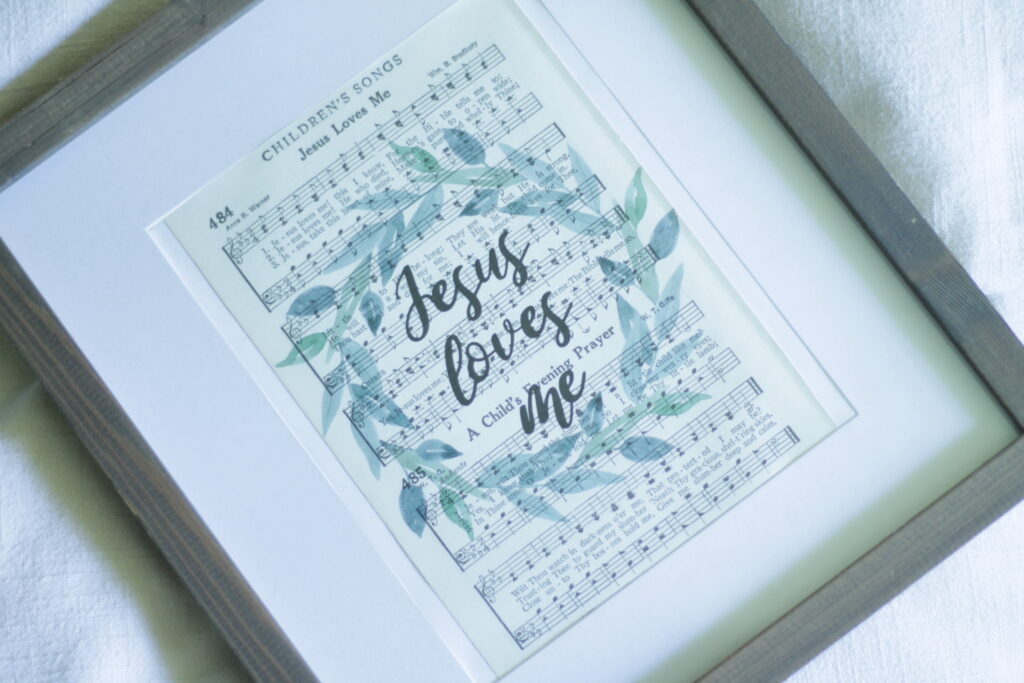
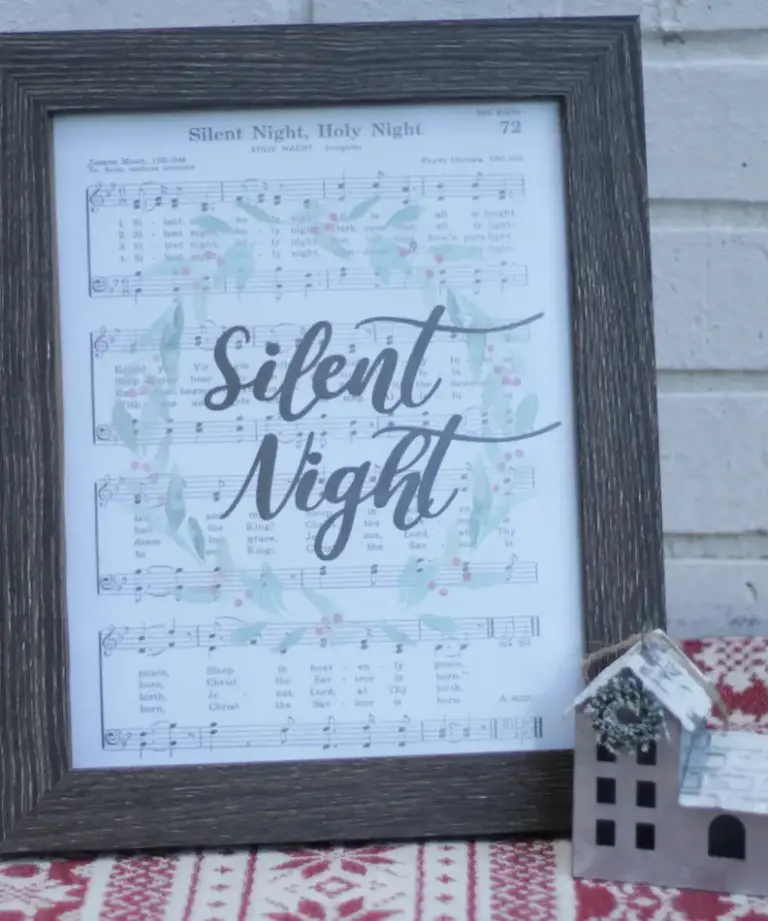
If you want, you can leave it on the white paper and frame the whole thing, or carefully take the hymn off of the white paper so you place it exactly how you want to in the frame. This is what I choose to do. (Using a tape that you can reposition makes this step much easier!)

Put it in your frame and enjoy! I used an 8×10 frame with a 5×7 mat inside. It does cover a small portion of the hymn but I thought it still looks nice!
Here is one I have hanging up in our baby girl’s bedroom. It was also hung in our second boy’s bedroom when he was a baby. I just love it so much. It is the perfect addition to any baby’s nursery, child’s bedroom…or anywhere in your house!
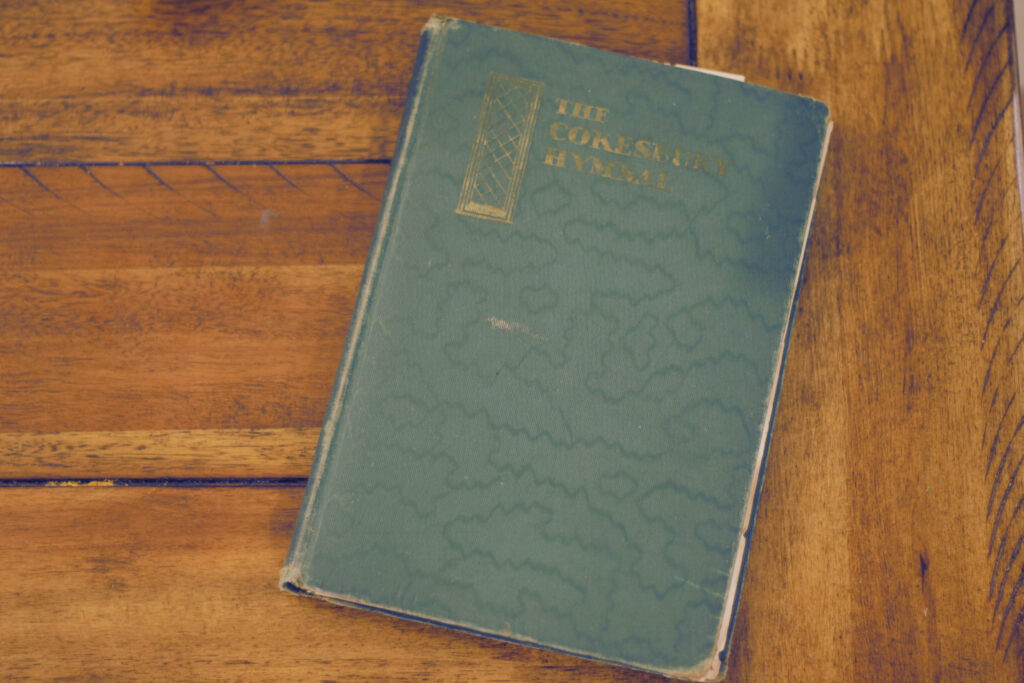
What if you don’t have or can’t find an old hymn book?
If you have checked thrift stores, yard sales and asked around but still can’t find an old hymn book, check out this online resource.
She has two different posts that she share numerous printable hymn sheet music for FREE!
Vintage Gospel Hymn Sheet Music
What font should I use?
I used a font called amalya, you can download it here for free to use for personal use.
Pin it for later

If you make this project and love it, I would love if tag me on Instagram @littletennesseehome with your beautiful creation!
You might also enjoy checking out my post on how to my your own Christmas song art!
You can download my already made hymn wall art for free!
These are made with song titles I’ve chosen and are adjusted for the size of my hymn pages.
What a great post! I love the pictures. Seeing it makes the process so much easier. I love hymns and sing Be Thou My Vision to my kids every night. Thank you for this wonderful post.