
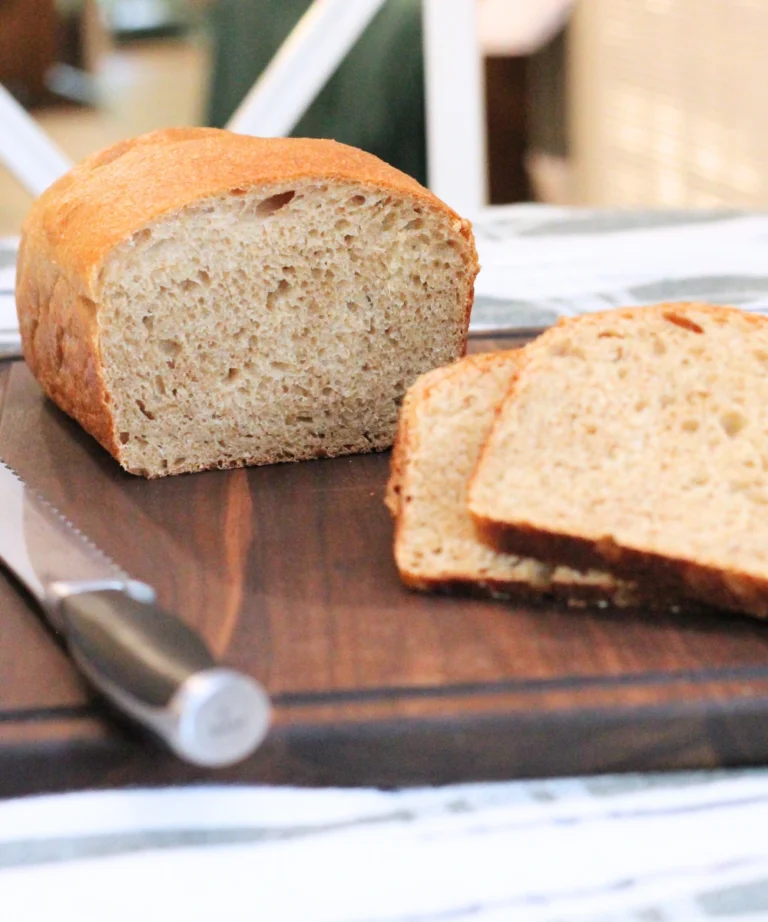
Soft and airy Potato flake sourdough pumpkin sandwich bread made from scratch! This simple recipe makes 1 big loaf and is great for dinner, sandwiches, and toast. It puts a twist on the traditional original potato flake sourdough loaf bread. Don’t let the pumpkin scare you, even beginner bakers can make it. While this bread is perfect for fall, it’s also versatile enough to enjoy year-round.

In this blog post, I’ll guide you through making Potato Flake Sourdough Pumpkin Sandwich Bread using an easy-to-follow recipe. We’ll also explore how this bread differs from pumpkin quick bread, talk about the tools you’ll need, and share with you the perks of using a potato flake starter.
What Is Potato Flake Sourdough Starter?
Maybe you haven’t heard about this type of sourdough. A potato flake sourdough starter is a type of wild yeast starter made using potato flakes, sugar, and water instead of flour. It’s similar to traditional sourdough starters but tends to produce a milder flavor and is a bit easier to manage. By feeding the starter with potato flakes, it stays active and ready to leaven breads like this one. If you don’t have a potato flake starter, you can create one or convert a traditional flour-based sourdough starter by using this guide to help you. This starter acts as the leavening agent, giving the bread its rise and distinct flavor.
How This Loaf Differs from Sweet Pumpkin Bread
It’s easy to confuse Pumpkin Sandwich Bread with pumpkin quick bread, but the two are very different. Pumpkin quick bread uses baking powder or baking soda, allowing the bread to rise quickly in the oven after only one rise time. While typical quick breads don’t have any rise time out of the oven, a sourdough quick bread has the option to ferment. This allows for the benefits of fermented grains as well as the delicious flavor from the starter. My pumpkin bread recipe (similar to my zucchini bread recipe) is sweeter and has a denser, cake-like texture.
In contrast, Potato Flake Sourdough Pumpkin Sandwich Bread is a bread that relies on the wild yeast in the potato flake sourdough starter to slowly ferment the dough for two different rise times. It has a chewy, tender crumb like that of a typical sandwich bread. This bread is ideal for sandwiches or toast, whereas pumpkin quick bread is more of a dessert or breakfast loaf, often containing spices like cinnamon and nutmeg, as well as more sugar.
This post may contain affiliate links through amazon, which means I may make a small commission at no extra cost to you. When you make a purchase through my link, you help me to keep Little Tennessee Home up and running! Thank you for your support! See my full disclosure here.
Tools You’ll Need
Before starting, make sure you have the following tools on hand for a smooth baking experience:
- Stand mixer with a dough hook attachment: Makes kneading easier and more consistent.
- Large bowl: For proofing the dough. Can also be used for making the dough if you don’t have a stand mixer, it will just take some patience and arm strength for the kneading.
- 9×5 Loaf pan: This is the perfect size for a large loaf, use multiple small loaf pans to get several smaller loaves to share with friends and family!
- Wooden spoon: If not using a stand mixer, this will help when mixing ingredients before kneading.
- Plastic wrap or beeswax wrap: To cover the dough during its proofing stages. This is better than using a tea towel because it prevents the dough from drying out.
- Parchment paper: Optional, but creates easy release from the loaf pan.
- Measuring cups and kitchen scale: Ensures accuracy, especially when measuring flour.
- Instant-read thermometer: To check the internal temperature of the loaf (should reach 205°F).
Ingredients
- 3 ½ cups bread flour (about 455g)
- ½ tablespoon table salt
- ½ cup potato flake sourdough starter (active and fed)
- ¾ cup pumpkin puree (canned or homemade)
- ¼ cup pure maple syrup
- 4 tablespoons unsalted butter, melted (about 55g)
Step-by-Step Instructions for Making Potato Flake Sourdough Pumpkin Sandwich Bread
Feed your starter:
Be sure that you have fed your starter at least 8 hours prior to mixing the dough. 12-24 hours is preferred because this allows the starter to become very active from its feeding.
Make the Dough:

In the bowl of your stand mixer, mix the dry ingredients—bread flour and table salt. It’s best to weigh the flour for the most accurate results. About 455 grams of flour.

Add the wet ingredients to the dry mixture and start mixing on low speed with the dough hook attachment. Let the mixer run until the dough starts to come together and pulls from the sides of the bowl. At this point, knead for an additional 5 minutes.

If you don’t have a stand mixer, you can mix by hand using a wooden spoon, then knead the dough on a lightly floured surface until smooth and elastic, which will take about 10 minutes.
Proof the Dough: First Rise

Once the dough has come together, transfer it to a lightly greased bowl, cover it with plastic wrap, and allow it to proof at room temperature for 8 hours, or until doubled in size. The exact time will depend on the temperature of your kitchen. For a faster rise, place the dough in a draft free, warm place, like an oven with the light off (You can turn the light on for a short time but be cautious because the light can get too hot, killing the wild yeast.) During the colder winter months, proofing may take longer.
Shape the Dough

When the dough has doubled in size, turn it out onto a clean work surface and gently press it into a rectangle. This removes any large air bubbles, creating a more uniform crumb in the finished loaf. Roll the dough into a tight log and place it into a greased loaf pan, seam side down.


Cover the pan loosely with plastic wrap (spray the plastic wrap with oil to prevent sticking) and let the dough proof again for another 10-12 hours, or until it rises about 2 inches above the rim of the loaf pan.

Bake the Bread

Once the dough has doubled, preheat your oven to 350°F (177°C) and bake the loaf for 40-45 minutes, or until the top is golden brown and the bread sounds hollow when tapped. For best results, use an instant-read thermometer to ensure the bread has reached an internal temperature of 205°F (96°C)
Allow the bread to cool in the pan for 5-10 minutes before turning it out onto a wire rack to cool completely. Avoid slicing the bread while it’s still warm, as this can affect the texture.

Storage and Serving Suggestions
This sandwich bread will stay fresh at room temperature for up to a week if stored in a bread box or bread bag. You can also freeze slices in an airtight container for longer storage. Simply thaw and toast for a quick breakfast or sandwich.
This bread is perfect for savory sandwiches, especially when paired with fall flavors like turkey, cranberry sauce, or roasted vegetables. Or, enjoy it toasted with butter and a drizzle of honey for a simple treat. It is especially delicious if used for making french toast! Just use this bread in the french toast recipe-you’ll only be sorry if you don’t try it!
Other Potato Flake Sourdough Pumpkin Recipes to Try:
If you love pumpkin as much as we do, here are a few more pumpkin recipes to try:
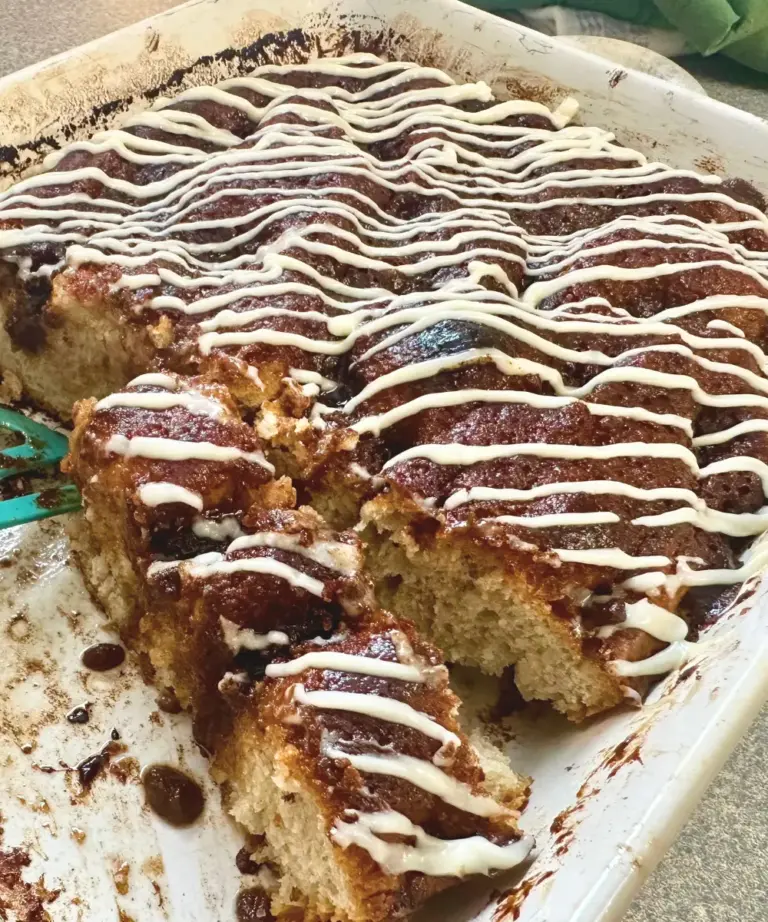
- Pumpkin Sourdough Cinnamon Rolls: These sweet rolls combine the flavors of potato flake sourdough with the rich flavor of pumpkin and a warm cinnamon swirl. (These are a favorite in our house!)
- Pumpkin Sourdough Muffins with Streusel Topping: Perfect for a quick breakfast or snack, these muffins are a fall favorite.
- Pumpkin Bread: A moist, spiced bread that’s easy to make and perfect with your morning coffee.
Tips for Success
- Use an Active Starter: Your potato flake sourdough starter should be active and well-fed for the best rise. If you haven’t fed your starter recently, do so 8-12 hours before making the dough.
- Temperature is Key: The dough rise times will vary based on your kitchen’s temperature. In warmer climates, the dough may rise more quickly, while in cooler months, it may take longer. Keep an eye on the dough’s progress and adjust your timing accordingly.
- Flour Variations: While this recipe calls for bread flour, you can experiment by using a mix of whole wheat flour or even all purpose flour if you don’t have bread flour. Just be mindful of the different hydration levels required with each type of flour. Also keep in mind that bread flour has a higher protein content than all purpose flour. Using different flour can change the texture of the bread slightly.

Common Questions
Can I make this bread with an alternative to pumpkin?
Absolutely! You can substitute pumpkin purée with sweet potatoes or even butternut squash for a slightly different flavor profile, though you may need to adjust the amount of water added to the dough.
What if I don’t have a potato flake starter?
If you’re new to sourdough, you can make your own potato flake starter by mixing active dry yeast, potato flakes, sugar, and warm water, then allowing it to ferment over a few days. Alternatively, if you have a regular sourdough starter, you can convert it by feeding it with the potato flake starter feeding instead of flour for a few feedings.
Can I use a bread machine?
Yes, but keep in mind that sourdough recipes take longer to rise than most bread machine cycles allow. You can use your machine for mixing and kneading, then transfer the dough to a loaf pan for the final rise and baking. If you want to bake in the bread machine, you will need to be sure to stop the cycle after the kneading and allow it to rise for the proper duration before switching it to the baking cycle.
This Potato Flake Sourdough Pumpkin Sandwich Bread is a delicious way to combine the flavors of pumpkin with the comforting texture of homemade bread. Whether you’re a seasoned sourdough baker or trying it for the first time, this recipe offers a rewarding baking experience with results that are perfect for sandwiches, toast, or simply enjoying warm from the oven with butter. Try it today and savor the taste of fall in every slice!
Pin for later and share with a friend:

If you give this recipe a try, I would greatly appreciate if you came back and gave it a 5-star review! It helps me out so much!
I also love seeing all of the delicious creations you make! Share your photo over on instagram and give me a tag @littletennesseehome

ADD ALL OF MY RECIPES TO YOUR MEAL PLANNING APP!
Use my link to get 20% off your first year of using plan to eat! Not only do you get an amazing meal planning tool, but you also will get access to ALL of my recipes from the blog on your meal planning app. PLUS you will gain additional access to exclusive personal recipes not found on the blog! Learn all about the app in my video!

Potato Flake Sourdough Pumpkin Sandwich Bread
Equipment
- Stand mixer with a dough hook attachment
- Large bowl
- 9×5 Loaf pan
- Wooden spoon (If not using a stand mixer)
- Plastic Wrap or Beeswax Wrap
- Parchment Paper
- Measuring cups, measuring spoons and kitchen scale
- Instant-read thermometer
Ingredients
- 3 ½ cups bread flour about 455g
- ½ tablespoon table salt
- ½ cup potato flake sourdough starter active and fed
- ¾ cup pumpkin puree canned or homemade
- ¼ cup pure maple syrup
- 4 tablespoons unsalted butter melted (about 55g)
Instructions
- Be sure that you have fed your starter at least 8 hours prior to mixing the dough. 12-24 hours is preferred because this allows the starter to become very active from its feeding.
- In the bowl of your stand mixer, mix the dry ingredients—bread flour and table salt. It’s best to weigh the flour for the most accurate results. About 455 grams of flour.
- Add the wet ingredients to the dry mixture and start mixing on low speed with the dough hook attachment. Let the mixer run until the dough starts to come together and pulls from the sides of the bowl. At this point, knead for an additional 5 minutes.
- If you don’t have a stand mixer, you can mix by hand using a wooden spoon, then knead the dough on a lightly floured surface until smooth and elastic, which will take about 10 minutes.
- Once the dough has come together, transfer it to a lightly greased bowl, cover it with plastic wrap, and allow it to proof at room temperature for 8 hours, or until doubled in size. The exact time will depend on the temperature of your kitchen. For a faster rise, place the dough in a draft free, warm place, like an oven with the light off (You can turn the light on for a short time but be cautious because the light can get too hot, killing the wild yeast.) During the colder winter months, proofing may take longer.
- When the dough has doubled in size, turn it out onto a clean work surface and gently press it into a rectangle. This removes any large air bubbles, creating a more uniform crumb in the finished loaf. Roll the dough into a tight log and place it into a greased loaf pan, seam side down.
- Cover the pan loosely with plastic wrap (spray the plastic wrap with oil to prevent sticking) and let the dough proof again for another 10-12 hours, or until it rises about 2 inches above the rim of the loaf pan.
- Once the dough has doubled, preheat your oven to 350°F (177°C) and bake the loaf for 40-45 minutes, or until the top is golden brown and the bread sounds hollow when tapped. For best results, use an instant-read thermometer to ensure the bread has reached an internal temperature of 205°F (96°C)
- Allow the bread to cool in the pan for 5-10 minutes before turning it out onto a wire rack to cool completely. Avoid slicing the bread while it’s still warm, as this can affect the texture.
- This sandwich bread will stay fresh at room temperature for up to a week if stored in a bread box or bread bag. You can also freeze slices in an airtight container for longer storage. Simply thaw and toast for a quick breakfast or sandwich.


This bread is dry as has an amazing texture! Thank you Magen for another wonderful recipe!