These Potato Flake Sourdough Raspberry White Chocolate Scones are buttery, tender, and filled with sweet white chocolate chips and fresh, tart raspberries. Topped with a beautiful homemade raspberry-lemon icing, they’re a delicious treat for breakfast, brunch, or an afternoon snack!

If you love my Potato Flake Sourdough Lemon Blueberry Scones, then you’re going to love this raspberry and white chocolate version!
There’s just something about the combination of raspberries and white chocolate that works so well together. The fresh raspberries add little pockets of tartness throughout the scones, while the white chocolate chips bring just the right amount of sweetness.
And the icing might be my favorite part! It’s made with fresh raspberries, lemon juice, and powdered sugar. Not only does it add another layer of flavor, but it also gives the scones a beautiful, naturally pink topping without any artificial coloring.
These scones are also a great way to use some of your potato flake sourdough starter. I like to prepare the dough ahead of time and allow it to slowly ferment in the refrigerator before baking. This makes it convenient to do most of the work ahead of time, especially when preparing them for breakfast or brunch.
Why You’ll Love These Raspberry White Chocolate Scones
- Tender and buttery: Cold butter and heavy cream help create a delicious, flaky texture.
- Sweet and tart: Fresh raspberries complement the creamy sweetness of white chocolate.
- Long-fermented: The dough rests in the refrigerator overnight, allowing the sourdough starter time to work slowly.
- Easy preparation: A food processor makes incorporating the cold butter quick and simple.
- Naturally pink icing: Fresh raspberries give the homemade icing a beautiful color without artificial food coloring.
- Perfect for making ahead: Prepare the dough the day before and bake the following day.
Why Use Potato Flake Sourdough Starter in Scones?
One thing I love about potato flake sourdough is how versatile it is. There are so many delicious ways to use it beyond traditional sourdough bread!
In this recipe, the potato flake sourdough starter adds moisture and flavor while the baking powder provides most of the rise during baking.
Unlike a traditional sourdough bread recipe, you don’t need to wait for the dough to double in size.
Instead, the scone dough rests in the refrigerator for a long, slow fermentation.
Refrigerating the dough also helps keep the butter cold, which is important for creating tender, flaky scones.
Because these scones contain baking powder, you can use active potato flake sourdough starter or healthy discard. However, I prefer using a recently fed starter when allowing the dough to ferment.
Tools Needed
This post may contain affiliate links, which means I may make a small commission at no extra cost to you. When you make a purchase through my link, you help me to keep Little Tennessee Home up and running! Thank you for your support! See my full disclosure here.
You don’t need a lot of fancy equipment to make homemade scones, but a few kitchen tools will make the process easier.
- Food processor: I use a food processor to incorporate the cold butter into the dry ingredients. This is a quick and easy method that helps keep the butter cold. You could also use a pastry blender.
- Large mixing bowl: For combining the wet and dry ingredients after processing the butter.
- Whisk: To combine the heavy cream and potato flake sourdough starter.
- Measuring cups and spoons: Or a kitchen scale for more accurate measurements.
- Bench scraper or sharp knife: To divide the dough into equal wedges.
- Baking sheet: For baking the scones.
- Parchment paper: To prevent sticking and make cleanup easier.
- Plastic wrap or an airtight container: For covering the scone dough while it ferments in the refrigerator.
- Fine mesh strainer: To remove the raspberry seeds from the icing.
- Small mixing bowl: For preparing the raspberry-lemon icing.
- Cooling rack: To allow the scones to cool before icing.
Ingredients You’ll Need to Make Raspberry White Chocolate Scones
Before getting started, gather all your ingredients. Keeping your butter and heavy cream cold is especially important when making scones!
For the Scones
All-Purpose Flour
Organic Cane Sugar
Baking Powder
Salt: If you use salted butter, eliminate the additional salt from the recipe.
Cold or Frozen Butter: Cold butter is one of the keys to making tender, flaky scones.
Heavy Cream:
Potato Flake Sourdough Starter: You can use active starter or healthy discard for this recipe.
White Chocolate Chips: You’ll need 1/2 cup of white chocolate chips. These add little pockets of creamy sweetness throughout the scones.
Fresh Raspberries
For the Raspberry Lemon Icing
Fresh Raspberries: Just three raspberries are needed to add natural color and a little raspberry flavor to the icing.
Fresh Lemon Juice: I use 1 tablespoon of lemon juice. The acidity complements the raspberries and balances the sweetness of the powdered sugar.
Powdered Sugar: You’ll need 1 1/2 cups of powdered sugar to create the icing.
Depending on how much juice your raspberries release, you may need to add a little additional lemon juice or cream to achieve your desired consistency.
How to Make Potato Flake Sourdough Raspberry White Chocolate Scones
Prepare Your Ingredients
Before you get started, make sure your butter is nice and cold. I like to use butter straight from the refrigerator or freezer.
Cut the butter into small cubes and place it back in the refrigerator while you prepare the remaining ingredients.
Keeping the butter cold is important because those little pieces of butter create steam as they melt in the oven, helping give the scones their tender, flaky texture.
Combine the Dry Ingredients
In the bowl of a food processor, add the all-purpose flour, organic cane sugar, baking powder, and salt.
Remember, if you’re using salted butter, you can leave the added salt out of the recipe.
Pulse the food processor a few times to thoroughly combine the dry ingredients.
Incorporate the Cold Butter
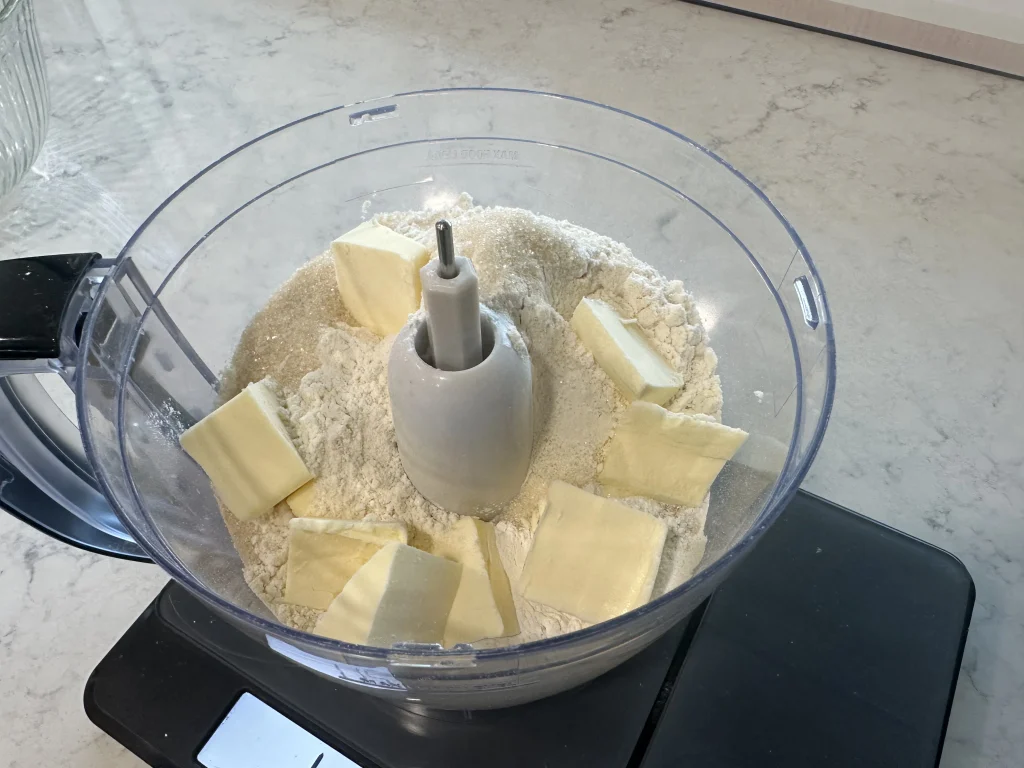
For this recipe, I use a food processor to incorporate the cold butter into the flour mixture. The food processor quickly breaks the butter into small pieces without having to work it into the flour by hand. I love using this method for making pie crust and biscuits as well!
Be careful not to overprocess! You want little pieces of butter remaining throughout the dough.
Add the cubed cold butter to the flour mixture in your food processor.
Pulse several times until the mixture resembles coarse crumbs with small, pea-sized pieces of butter throughout.
You don’t want to run the food processor continuously or process the mixture until it’s completely smooth.
The goal is to cut the butter into the flour, not blend it completely into the flour.
Using a food processor makes this process quick and easy, and it also helps prevent the butter from warming too much while you’re working with it.
Once the butter is incorporated, transfer the mixture to a large mixing bowl.
Add the Wet Ingredients
In a separate bowl, whisk together the heavy cream and potato flake sourdough starter until fairly well combined.
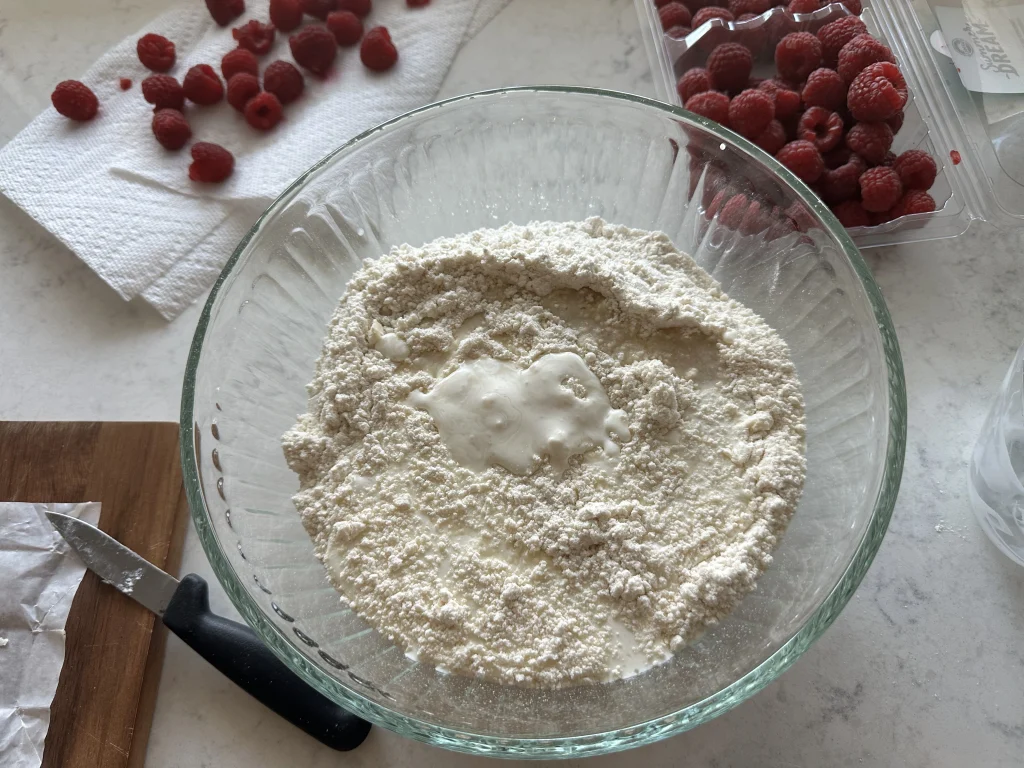
Pour the wet ingredients into the flour and butter mixture.
Using a spoon or spatula, gently stir until the dough begins to come together.
The dough may look a little shaggy at this point, and that’s perfectly fine!
Unlike bread dough, you don’t want to knead scone dough until it’s smooth and elastic. Overworking the dough can develop too much gluten, resulting in tougher scones.
Add the Raspberries and White Chocolate
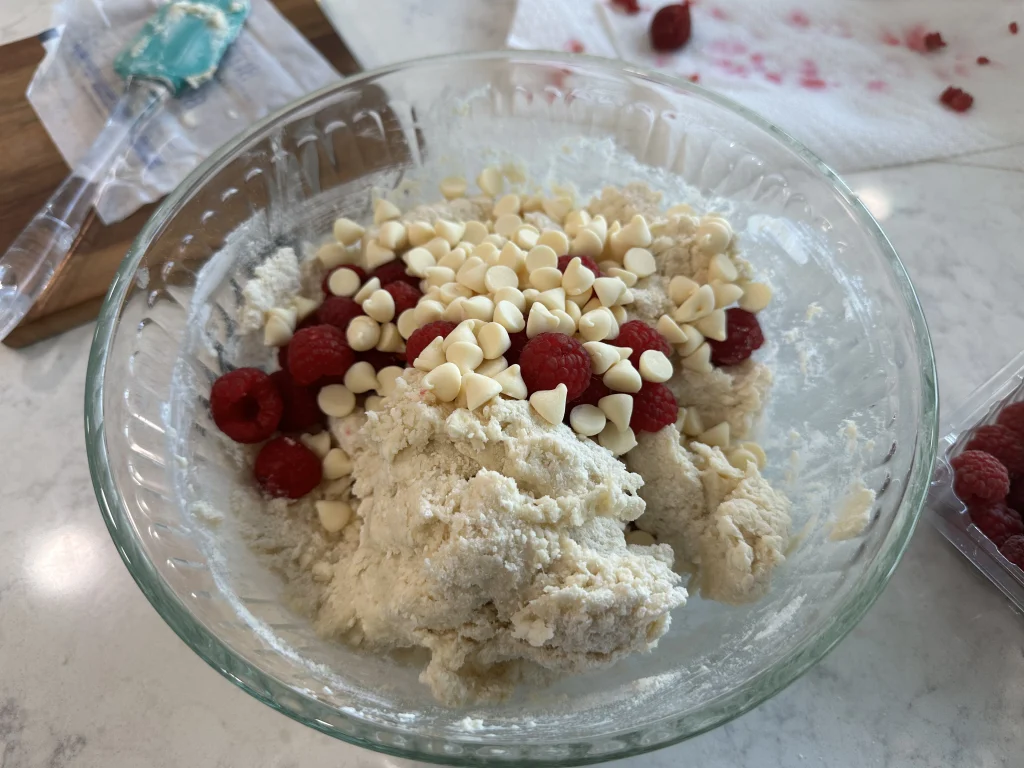
Add the white chocolate chips and fresh raspberries to the dough.
After you wash and dry the raspberries, gently fold them in until they are fairly evenly distributed.
Be especially careful when incorporating the fresh berries because they are delicate and can easily break apart.
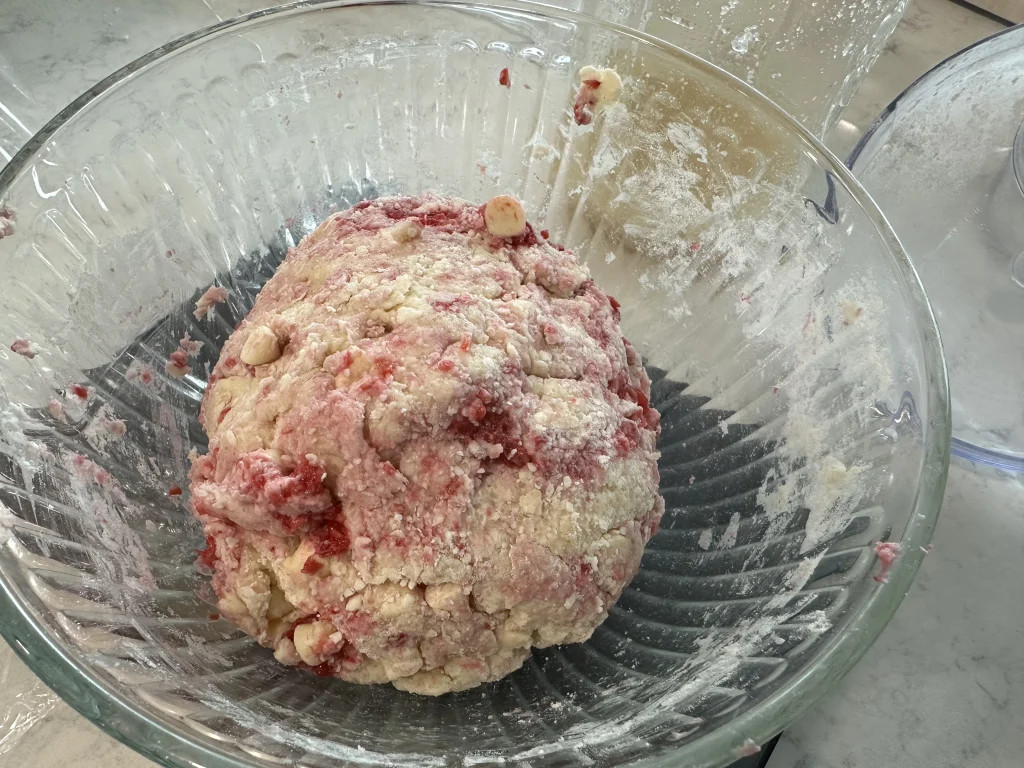
A few broken raspberries won’t hurt anything, but you don’t want to mash them completely into the dough.
Tip: If your raspberries are particularly soft, you can place them in the refrigerator or freezer for a few minutes before adding them to the dough. This can help them hold their shape a little better.
Long Fermentation in the Refrigerator
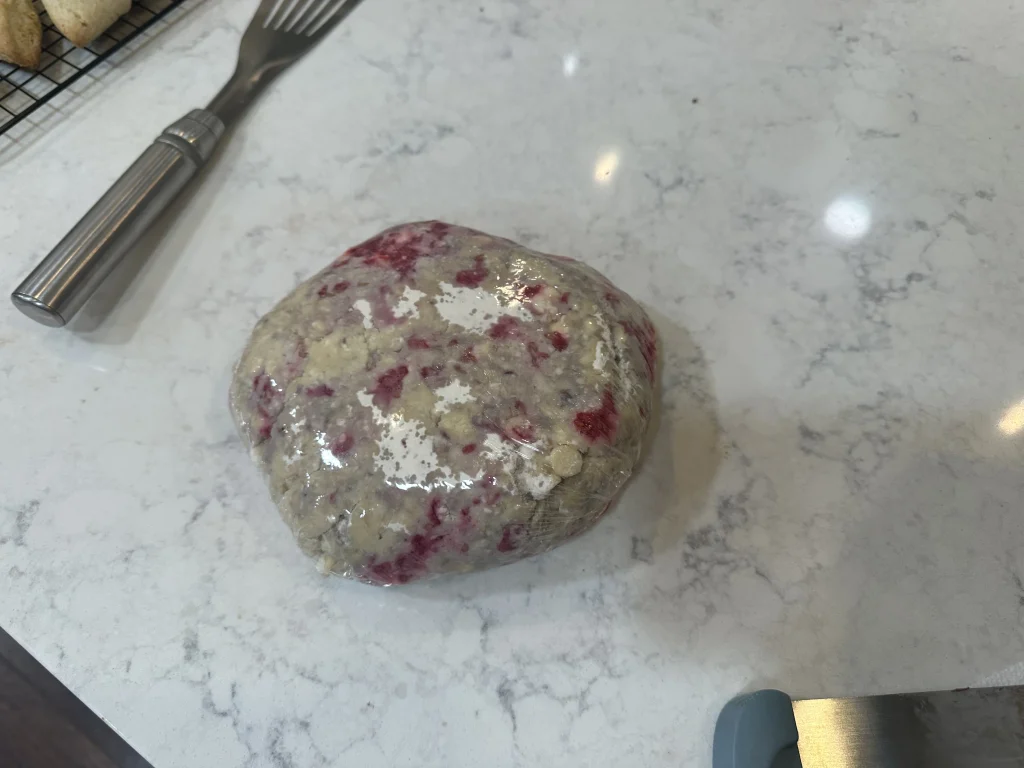
Once the dough is mixed, form it into a dough ball, dust lightly with flour, and wrap it tightly in plastic wrap.
Refrigerate the dough for at least 30 minutes to allow the butter to firm up and the flavors to come together.
For an even better flavor and digestion benefits, you can refrigerate the dough overnight or up to 24 hours. This step is essential for creating tender scones with a flaky texture. This fermentation process is what makes the grains easier to digest.
During this time, the potato flake sourdough starter has an opportunity to slowly ferment the dough while the cold temperature helps keep the butter firm.
You won’t necessarily notice a dramatic increase in size during this process, and that’s okay!
Unlike sourdough bread, these scones rely primarily on baking powder to rise during baking.
Shape and Cut the Scones
Preheat your oven to 425°F.
After the long fermentation, turn the dough out onto a lightly floured work surface.
Using your hands, gently form it into a round disc approximately 8 inches in diameter and 1 inch thick.
Try to handle the dough as little as possible. You want it to hold together, but you don’t need to knead it.
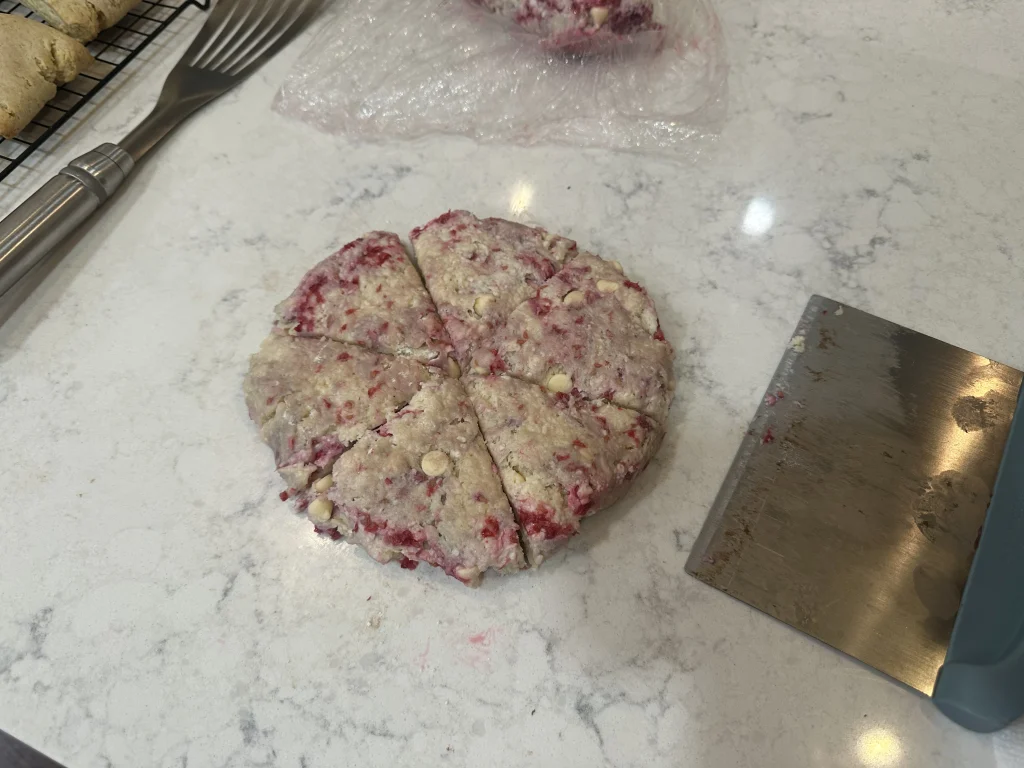
Using a sharp knife or bench scraper, cut the dough into 8 equal wedges, just like you would cut a pizza.
Carefully transfer the wedges to a baking sheet lined with parchment paper.
Leave approximately 2 inches between each scone to allow room for them to rise and spread slightly during baking.
Place in the Freezer
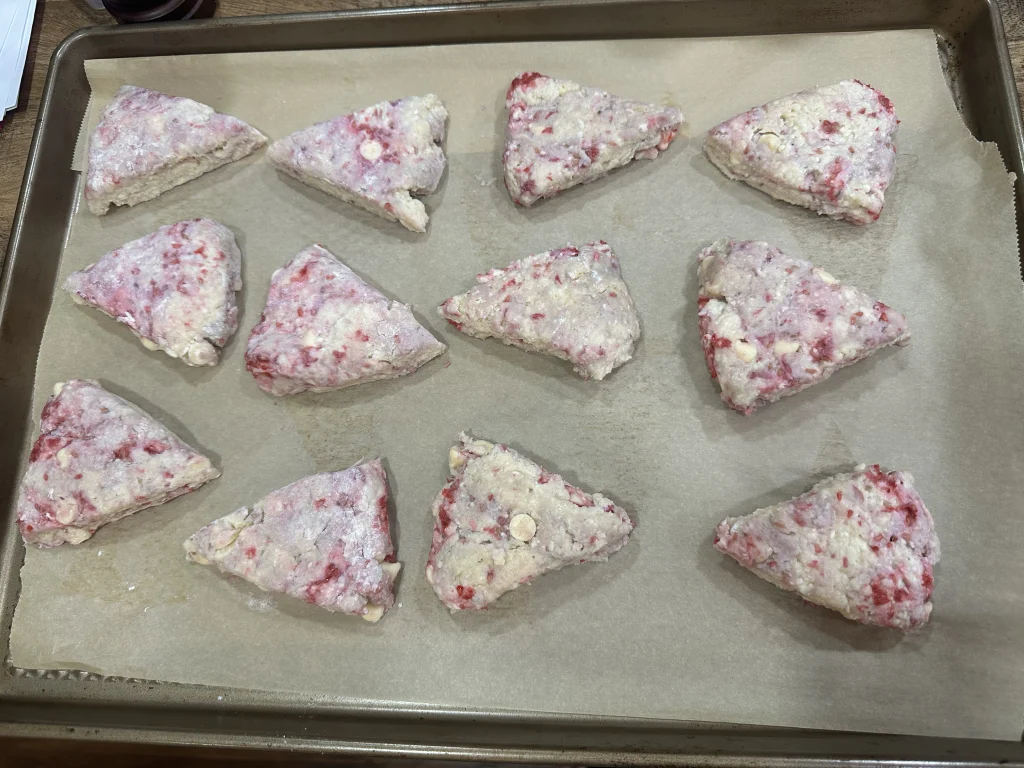
Once the scones are shaped and placed on the baking sheet, cover them well with plastic wrap to prevent the dough from drying out.
Place the baking sheet into the freezer for 10 minutes while the oven finishes preheating.
This helps firm up the butter again and keeps the scones from spreading too much during baking.
Bake the Scones
When you’re ready to bake, remove the scones from the freezer and uncover them.
Place the baking sheet on the middle oven rack and bake directly from the freezer for approximately 15–20 minutes, or until the scones have risen and the tops and edges are lightly golden brown.
The exact baking time may vary depending on your oven and the thickness of your scones, so begin checking around the 15-minute mark.
The outside should be lightly golden, and the center should be fully baked without being wet or doughy.
Once finished, remove the scones from the oven and allow them to cool on the baking sheet for a few minutes before transferring them to a cooling rack.
Make the Raspberry Lemon Icing
While the scones are cooling, prepare the homemade raspberry-lemon icing.
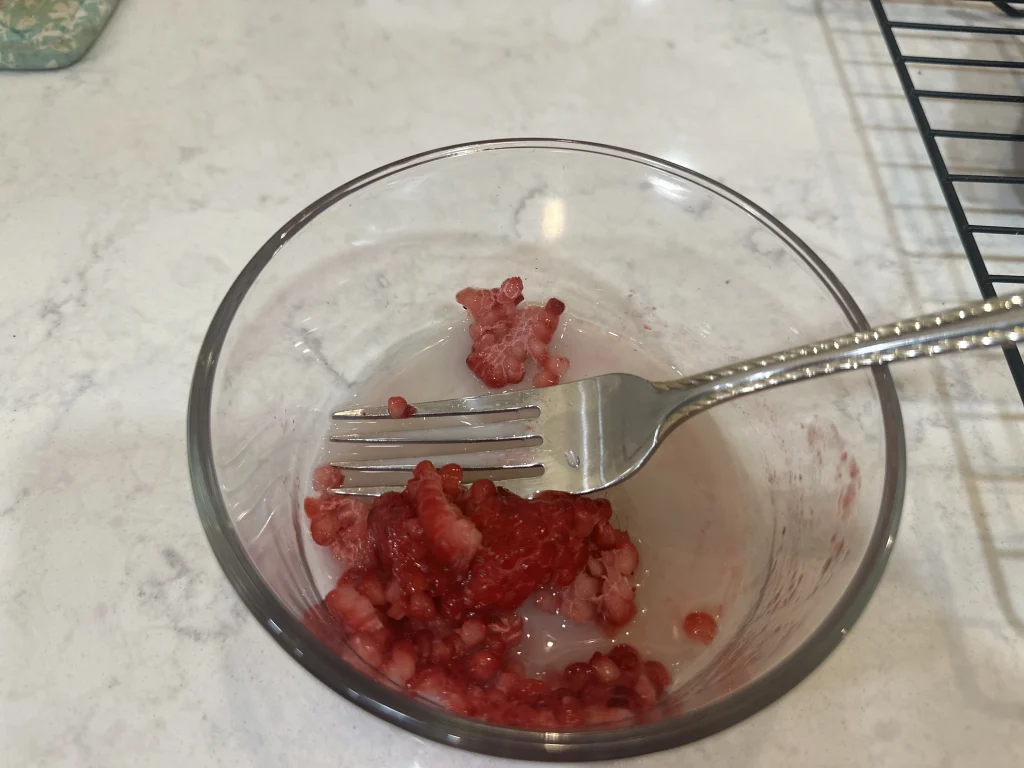
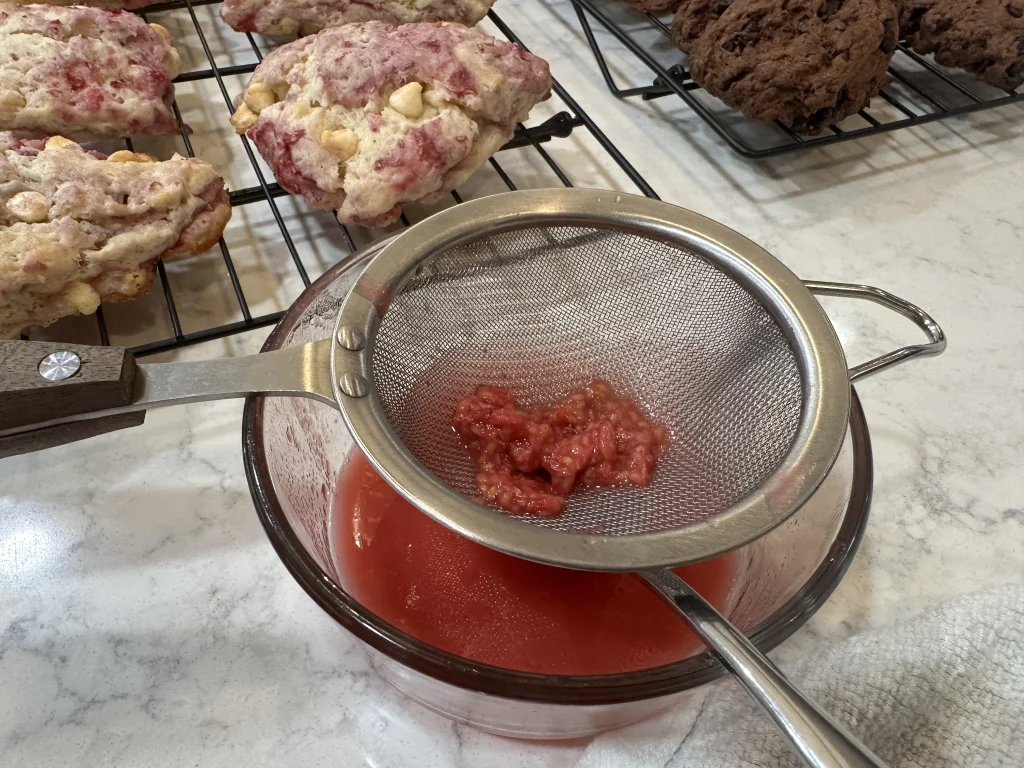
Place three fresh raspberries into a small bowl with 1 tablespoon of fresh lemon juice.
Allow the raspberries to soak for a few minutes before using a fork to mash them into the lemon juice.
Pour the mixture through a fine mesh strainer, pressing gently to extract the juice while removing the seeds and pulp.
In a separate bowl, add 1 1/2 cups of powdered sugar.
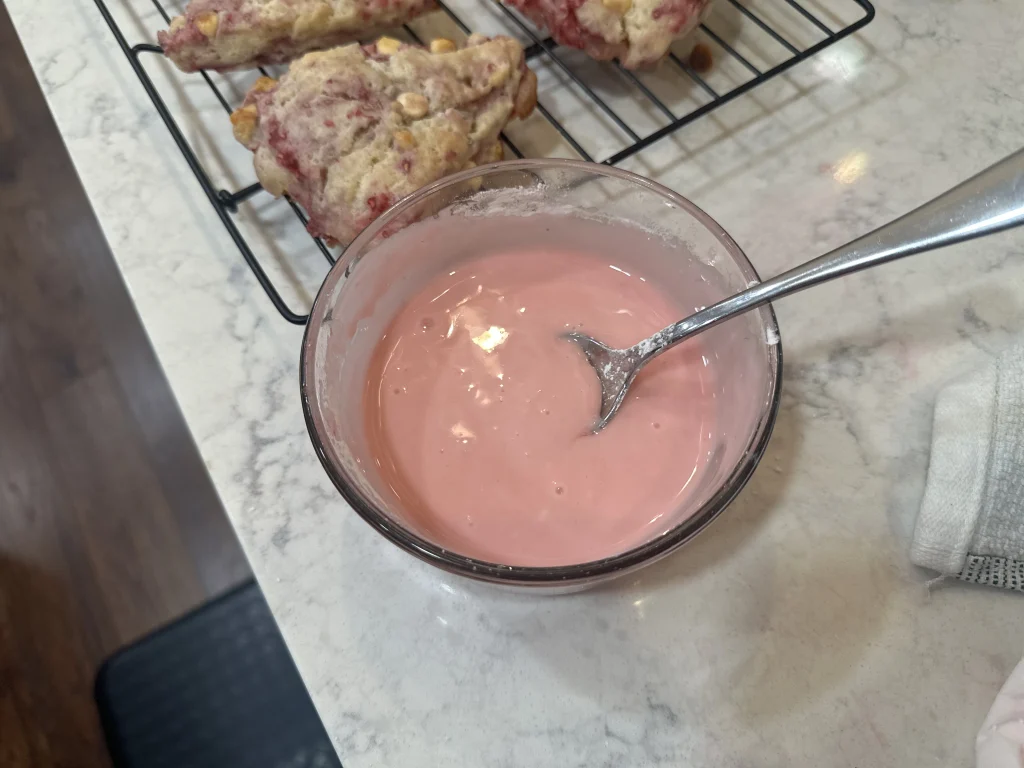
Pour the strained raspberry-lemon juice into the powdered sugar and whisk until smooth.
Depending on the amount of juice released from the raspberries, you may need to add a little additional lemon juice or cream.
Add any additional liquid just a teaspoon at a time until you reach your desired consistency.
You want the icing to be thick enough to stay on top of the scones but thin enough to drizzle.
The raspberries give the icing a beautiful, naturally pink color without needing any food coloring!
Ice and Enjoy!
Once your scones have cooled, drizzle the raspberry-lemon icing over the tops. I used a plastic bag to pipe the icing on top.

You can also use a spoon to drizzle the icing back and forth or spread it gently over the top of each scone.
Allow the icing to set slightly before serving.
These scones are especially delicious when they’re freshly baked!
Tips for Making the Best Raspberry White Chocolate Scones
Keep Your Ingredients Cold
One of the most important things to remember when making scones is to keep your butter cold!
The little pieces of cold butter throughout the dough are what help create the flaky layers as the scones bake.
I like using a food processor because it allows me to incorporate the butter quickly without having to handle it too much.
The long fermentation in the refrigerator is also helpful because it keeps the shaped dough cold until it’s time to bake.
Don’t Overprocess the Butter
While the food processor makes preparing the dough easier, it is possible to overdo it.
You want to pulse the butter into the flour until you have a coarse, crumbly mixture with little pieces of butter remaining.
If you process it too much, the butter can become too finely incorporated into the flour, and you may lose some of that flaky texture.
Don’t Overwork the Dough
Scone dough is completely different from bread dough.
You don’t need to knead it, stretch it, or work it until it’s smooth.
In fact, doing so can make the finished scones tough.
Gently mix the ingredients until they come together, and handle the dough as little as possible when shaping.
Be Gentle With the Raspberries
Raspberries are much softer than blueberries, so they require a little extra care when mixing them into the dough.
Try to fold them in gently and avoid crushing them.
If a few break apart, that’s okay! Just be mindful that too many crushed raspberries can release excess juice and make the dough stickier.
Cover the Dough Well During Fermentation
Since these scones are going to spend several hours in the refrigerator, it’s important to cover them well.
Plastic wrap works great for preventing the surface of the dough from drying out.
You can also use a covered baking sheet or another airtight container if you have one large enough to hold the shaped scones.
Bake Directly From the Refrigerator
There’s no need to let your scones warm up on the counter before baking.
In fact, I prefer baking scones while the butter is still cold.
Simply remove the covering and place them into your fully preheated oven.
Let the Scones Cool Before Adding Icing
I know it’s tempting to add the icing as soon as the scones come out of the oven, but I recommend allowing them to cool first.
If the scones are too hot, the icing will melt and run right off.
Waiting until they’re mostly cool allows the icing to stay thicker and gives them that pretty pink topping.
Frequently Asked Questions
Can I Use Potato Flake Sourdough Discard?
Yes!
Since this recipe uses baking powder to help the scones rise, you don’t need your starter to be at peak activity.
Both active potato flake sourdough starter and healthy discard can be used.
However, if you’re wanting the benefits of a long fermentation, I recommend using a recently fed starter so that the yeast and bacteria are more active during the refrigeration period.
Why Do You Refrigerate the Scone Dough Overnight?
I like to give the potato flake sourdough starter time to slowly ferment the dough rather than mixing everything together and baking it immediately.
The refrigerator slows fermentation down, allowing the dough to rest for several hours without becoming overly warm.
It also keeps the butter cold, which is important for maintaining the texture of the scones.
As an added bonus, preparing the dough the night before makes baking them the following morning so much easier!
Do the Scones Need to Double in Size During Fermentation?
No!
Unlike a traditional sourdough bread recipe, these scones do not need to double in size.
The baking powder does most of the work when it comes to rising in the oven.
Don’t worry if your scones look about the same size when you take them out of the refrigerator.
Can I Use Salted Butter Instead of Unsalted Butter?
Yes!
I typically use unsalted butter when baking because it allows me to control the amount of salt in the recipe.
However, salted butter will work just fine.
If using salted butter, simply omit the 1/2 teaspoon of salt called for in the recipe.
Can I Make These Scones Without a Food Processor?
Yes! Although I use a food processor for this recipe, you can still make these scones without one.
Simply combine the dry ingredients in a large mixing bowl and use a pastry cutter or fork to cut the cold butter into the flour.
You can also grate frozen butter using a cheese grater.
Once the butter is incorporated, continue with the recipe as written.
Can I Use Frozen Raspberries?
You can experiment with frozen raspberries, although I prefer fresh raspberries for this recipe.
Frozen raspberries tend to release more moisture as they thaw, and this may become especially noticeable during the overnight fermentation.
If using frozen raspberries, add them directly to the dough while they’re still frozen.
Keep in mind that the dough may become slightly wetter as it rests.
Why Did My Scones Spread Instead of Rising?
There are several reasons your scones may spread too much while baking.
One of the most common reasons is that the butter became too warm before the scones went into the oven.
Overworking the dough or adding too much moisture can also contribute to spreading.
Be sure to keep your butter cold, handle the dough gently, and place the scones directly from the refrigerator into a fully preheated oven.
Can I Skip the Overnight Fermentation?
If you’re short on time, you can bake the scones without the long refrigerator fermentation.
However, I recommend chilling the shaped dough for at least 20–30 minutes before baking to help keep the butter cold.
Keep in mind that skipping the overnight rest also means the starter won’t have the same opportunity to ferment the dough.
The overnight method is the one I prefer for this recipe.
Can I Freeze These Scones?
Yes! These scones can be frozen before or after baking.
To freeze unbaked scones, prepare and shape the dough as directed, allowing the dough to complete its overnight fermentation in the refrigerator first.
Then transfer the shaped scones to the freezer on a parchment-lined baking sheet until firm.
Once frozen, place them in a freezer-safe bag or airtight container.
When ready to bake, place the frozen scones directly onto a prepared baking sheet and bake from frozen, allowing additional time as needed.
I recommend waiting to add the icing until after the scones have been baked and cooled.
Storage and Freezing
These Raspberry White Chocolate Scones are best enjoyed fresh, but leftovers can easily be stored for later.
Because they contain fresh raspberries, I recommend storing leftover scones in an airtight container in the refrigerator for up to 3–4 days.
For longer storage, freeze the baked scones without icing in a freezer-safe container or bag for up to 2–3 months for the best quality.
When you’re ready to enjoy one, allow it to thaw and warm it in a 350°F oven for a few minutes.
If possible, wait to add the raspberry-lemon icing until after reheating.
More Potato Flake Sourdough Recipes You’ll Love
If you enjoyed these Raspberry White Chocolate Scones, be sure to check out some of my other potato flake sourdough recipes!
These Potato Flake Sourdough Raspberry White Chocolate Scones are such a delicious way to use your potato flake sourdough starter. The combination of buttery, tender scones, tart raspberries, creamy white chocolate, and sweet raspberry-lemon icing makes them a wonderful treat for just about any occasion.
I especially love that you can prepare the dough the night before and bake the scones fresh the following morning.
If you give this recipe a try, I’d love for you to come back and leave a 5-star review! It helps support Little Tennessee Home and lets others know what you thought of the recipe.
And don’t forget to share your creations with me on Instagram by tagging @littletennesseehome. I always love seeing what you’re making in your own kitchens!

Potato Flake Sourdough Raspberry White Chocolate Scones
Equipment
- Food processor
- Large mixing bowl
- Whisk
- Measuring cups and spoons (or kitchen scale)
- Bench scraper or sharp knife
- Baking Sheet
- Parchment Paper
- Plastic wrap
- Fine mesh strainer
- Small mixing bowl
- Cooling Rack
Ingredients
For the Scones
- 2 1/2 cups 315 g all-purpose flour
- 1/4 cup 68 g organic cane sugar
- 1 tablespoon 9 g baking powder
- 1/2 teaspoon salt omit if using salted butter
- 8 tablespoons 113 g cold or frozen butter
- 3/4 cup heavy cream
- 1/2 cup potato flake sourdough starter
- 1/2 cup white chocolate chips
- 1/2 cup fresh raspberries
For the Raspberry Lemon Icing
- 3 fresh raspberries
- 1 tablespoon fresh lemon juice
- 1 1/2 cups powdered sugar
- Additional lemon juice or cream if needed
Instructions
- Prepare the butter: Cut the cold or frozen butter into small cubes and keep refrigerated until ready to use.
- Combine the dry ingredients: In the bowl of a food processor, add the flour, organic cane sugar, baking powder, and salt. Pulse a few times to combine. Omit the salt if using salted butter.
- Incorporate the butter: Add the cold butter cubes and pulse several times until the mixture resembles coarse crumbs with small, pea-sized pieces of butter throughout. Avoid overprocessing.
- Mix the wet ingredients: Transfer the flour and butter mixture to a large mixing bowl. In a separate bowl, whisk together the heavy cream and potato flake sourdough starter.
- Combine: Pour the wet ingredients into the dry ingredients and gently stir until a shaggy dough begins to form. Avoid overmixing.
- Add the mix-ins: Gently fold in the white chocolate chips and fresh raspberries, being careful not to crush the berries.
- Form the dough: Once the dough is mixed, gently bring it together into a dough ball. Dust lightly with flour and wrap tightly in plastic wrap.
- Chill and ferment: Refrigerate the dough for at least 30 minutes to allow the butter to firm up and the flavors to come together. For a longer fermentation, refrigerate overnight or up to 24 hours. Keeping the dough cold helps create tender scones with a flaky texture.
- Shape the scones: After fermentation, remove the dough from the refrigerator and place it on a lightly floured work surface. Gently shape it into an approximately 8-inch round disc, about 1 inch thick.
- Cut the dough: Using a bench scraper or sharp knife, cut the dough into 8 equal wedges.
- Prepare for baking: Place the scones on a parchment-lined baking sheet, leaving approximately 2 inches of space between each one. Place the baking sheet in the freezer for 10 minutes while the oven finishes preheating. This helps firm up the butter again and keeps the scones from spreading too much during baking.
- Bake: Preheat the oven to 425°F. Remove the scones from the freezer and bake directly from cold on the middle oven rack for approximately 15–20 minutes, or until lightly golden and baked through. Begin checking around 15 minutes.
- Cool: Allow the scones to cool on the baking sheet for a few minutes before transferring them to a cooling rack.
- Prepare the icing: Place three raspberries in a small bowl with 1 tablespoon of lemon juice. Let sit for a few minutes, then mash with a fork. Press through a fine mesh strainer to remove the seeds.
- Mix the icing: Combine the strained raspberry-lemon juice with 1 1/2 cups powdered sugar. Whisk until smooth, adding additional lemon juice or cream a teaspoon at a time as needed.
- Ice and serve: Once the scones have cooled, drizzle the raspberry-lemon icing over the tops and enjoy!
Notes
Food Processor: Pulse the butter into the dry ingredients until coarse crumbs form. Avoid overprocessing.
Starter: Active potato flake sourdough starter or healthy discard can be used.
Chilling and Fermentation: Refrigerate the wrapped dough for a minimum of 30 minutes, or overnight for up to 24 hours. A longer rest allows additional time for sourdough fermentation, although refrigeration slows microbial activity, you can leave the dough in the fridge for several days before baking.
Freezer Step: After cutting and arranging the scones on your baking sheet, freeze for 10 minutes before baking. This helps keep the butter cold and encourages the scones to hold their shape.
Raspberries: Fold fresh raspberries into the dough gently to prevent crushing them and releasing excess moisture.
Baking Time: Bake at 425°F for approximately 15–20 minutes. Confirm the exact baking time with your next batch.
Storage: Refrigerate leftover scones in an airtight container for up to 3–4 days.