
One of the most common questions I hear is about potato flake starter feeding ratios—how much to feed, when to feed more, how to increase the amount of starter, and whether you can “overfeed” your starter. I’ve already covered a lot about feeding a potato flake starter in my post How to Feed and Care for a Potato Flake Starter, that’s where I share the basics of keeping your starter alive and happy. Here in this post I want to go more in depth about all of feeding questions beyond the basics of feeding a new starter.

For bakers with an existing starter, this post will clear up some of those questions and go into more detail about adjusting your feeding amounts.
This post will help you answer:
- How to build up your starter with double or triple feedings when extra is needed
- How to scale back on feeding when you only want to keep a small amount
- Common issues and how to avoid them
This post may contain affiliate links through amazon, which means I may make a small commission at no extra cost to you. When you make a purchase through my link, you help me to keep Little Tennessee Home up and running! Thank you for your support! See my full disclosure here.
Feed According to How Much Starter You Have
The first key to success is remembering that you must feed your starter based on how much is already in your jar. With a potato flake sourdough starter, the balance comes from feeding enough sugar, potato flakes, and water to fuel the wild yeast.
Think of it like caring for a pet—you have to feed it the right amount for its size.
If you underfeed, your starter will slow down because it doesn’t have enough food. You can feed it extra, but it will take it longer to consume the larger amounts of food, so keep that in mind when planning your time frame of when you want to bake. It’s also important to note that if you overfeed without letting yeast “catch up” can lead to weak starter activity.
The Go-To Feeding Ratio

For every 1 cup of the starter in your jar, add:
- 1 cup of warm water (around 100°F, no hotter than 110°F). Warm water wakes up the yeast and keeps fermentation steady.
- ¾ cup of sugar. This is the yeast’s main food source. White sugar or organic cane sugar works best, but you can substitute raw sugar if you prefer. Brown sugar can be used on occasion, but not for consistent feeding. While I’ve heard of people using honey, and while it can work, it’s best to avoid honey, because over time it can slow the wild yeast. Honey is antimicrobial so it will potentially fight against the wild yeast in your starter.
- 3 tablespoons of instant potato flakes. Be sure the flakes are unflavored and free of additives. You want just “potatoes” listed on the ingredient label.
I always mix these together in a separate measuring cup before adding them to the starter. This ensures the sugar dissolves. Once combined, stir well into your own starter and cover loosely with a lid or a cloth and rubber band. A plastic lid is better than a metal lid since it won’t rust.
How Much Sugar Should You Use?
Why is sugar important?
- Sugar acts as an easily accessible fuel source for the yeast. It often speeds up fermentation and helps produce stronger bubbling, especially in this kind of “sweet” starter.
- But too much sugar can have negative effects: at high concentrations sugar can draw water from yeast cells (osmotic stress), slowing activity.
You may see different sugar amounts in other recipes—anywhere from ¼ cup to ¾ cup of sugar per 1 cup of the starter. The truth is, it’s mostly a matter of preference.
A lower sugar amount (like ¼ cup) will still feed your starter, but it may not bubble up as strongly or produce a good rise. A higher sugar amount (closer to ¾ cup) usually produces the most vigorous and reliable starter activity. Feeding it more sugar can cause too much activity that will then result in the starter weakening over time.
Personally, I stick with ¾ cup of sugar every time because my starter is happy with it—and when something’s working, I don’t want to mess with a good thing! That said, if you’d like to experiment, you can slowly adjust the sugar down and see how your starter responds.
Why Ratios Matter
The feeding ratio is more than just a recipe—it’s what keeps your type of starter strong. The water hydrates, the sugar fuels the yeast, and the potato flakes provide starch which also fuels the wild yeasts. Without the right balance, your starter may turn sluggish, smell off, or fail to produce a good rise.
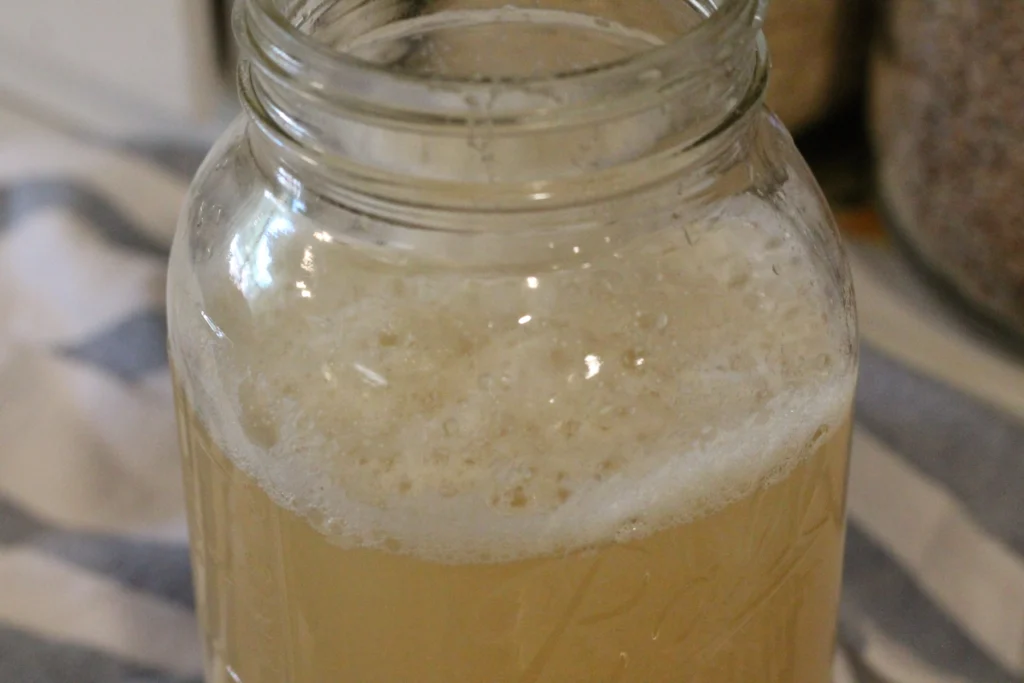
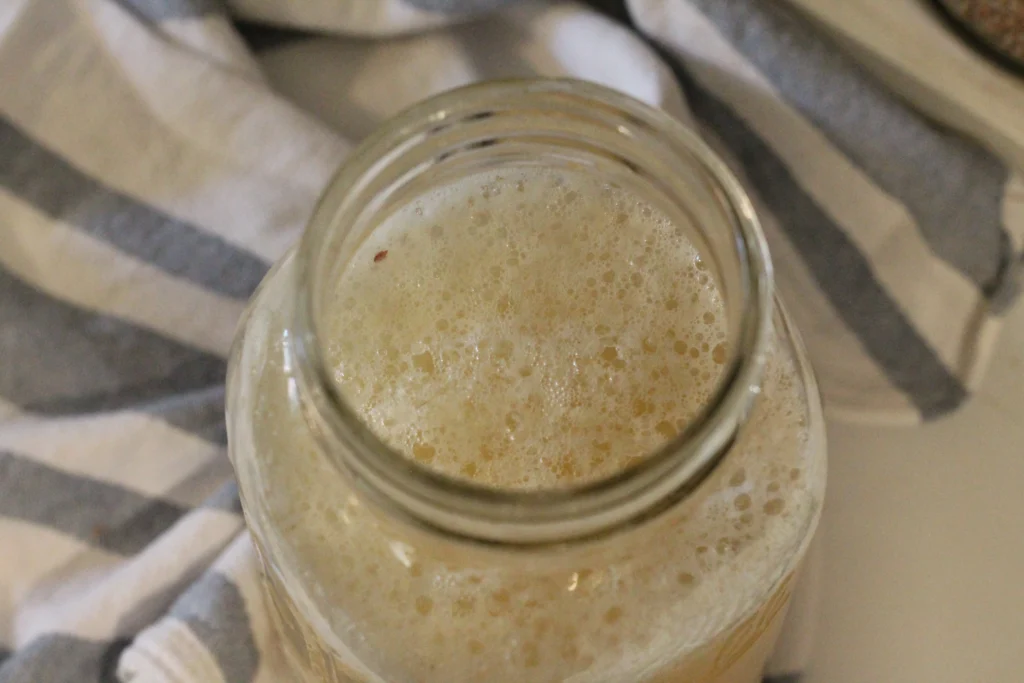
When fed properly, your starter should begin to bubble within hours, with a layer of foam or froth appearing on top after 8–24 hours. This is your sign that the yeast is active and ready to use in dough for white bread, cinnamon rolls, dinner rolls, or whatever recipe you plan on making.
When You Might Adjust Feeding Amounts
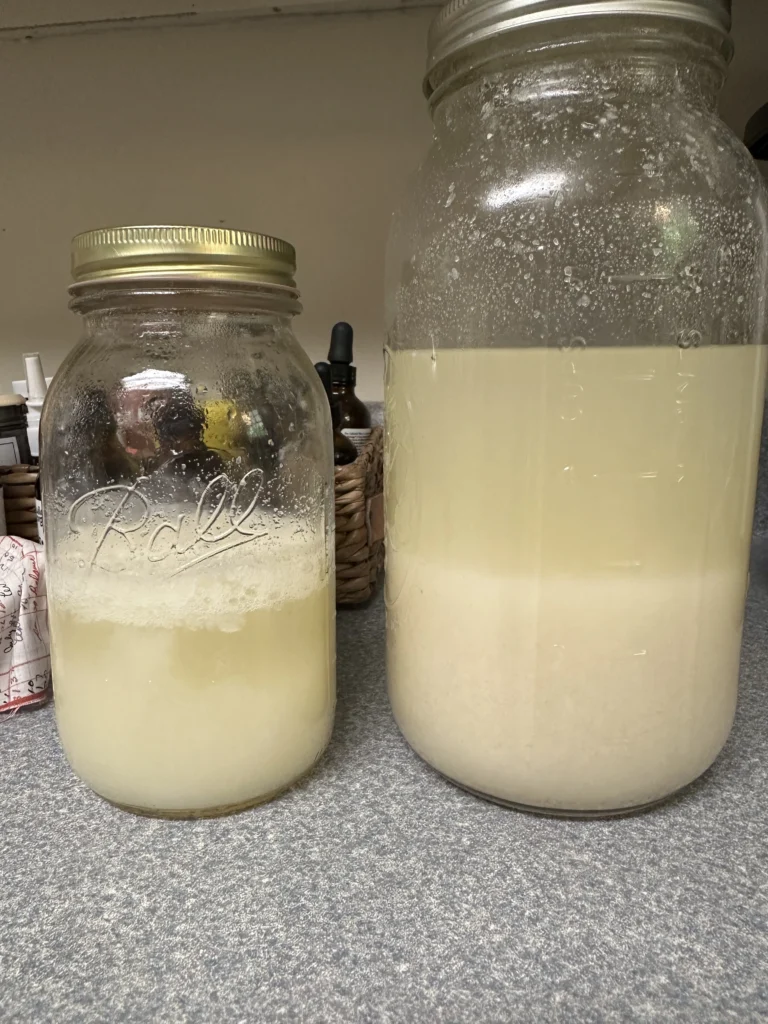
- If you want to keep less starter (less than “1 cup”) — you can scale everything down proportionally. Smaller jars, fewer ingredients, same ratios.
- If you want a lot of starter (for a big bake or to share) — you can double or triple the feeding. But note: larger feedings require longer time for yeast to consume the food and fully activate.
Adjusting Your Feeding Amounts
One nice thing about a potato flake sourdough starter is that you have some flexibility with feeding. The standard ratio works beautifully—but you don’t always have to scale everything down perfectly.
- If you have less than 1 cup of the starter: You can still feed it the full amount. This is a great way to “build up” your starter if you want more on hand for a bigger bake or to share with a friend. The yeast won’t complain about extra food—it will simply grow into it.
- If you don’t need much starter: Just feed the minimum amount based on what you already have. For example, if you’re keeping only ½ cup starter, you can feed it with ½ cup water, ⅜ cup sugar, and 1½ tablespoons potato flakes. This keeps your starter healthy without creating more than you’ll use.
Some bakers even use double or triple feedings. When doing this it’s important to let the starter feed for at least 12–24 hours, before using to ensure that it has had plenty of time with the larger amount of food to consume.
Quick Guide: Double or Triple Feeding
Here is a guid to your double and triple feedings. You’ll be surprised at how simple it actually is! It’s exactly as it sounds. you double or triple your feeding amounts.
- Double: Feed your starter 2 cups of water, 1 1/2 cups of sugar, and 6 tablespoons of potato flakes.
- Triple: Feed your starter 3 cups of water, 2 cups of sugar, and 9 tablespoons of potato flakes.
Feeding it these larger amounts will increase your starter size and allow you to make huge batches of bread if you want. One reason I like to double or triple feed is so that I can pull from it all week. After the starter has had time to feed on the ingredients. It stays active enough to use for several days afterwards. I will use it multiple days in a row without having to feed it again until it gets low. I just don’t leave it out at room temperature for more than a week without feeding it!
Water Temperature and Environment
One detail that makes a huge difference is water temperature. Too hot, and you can kill the yeast. Too cold, and fermentation slows down. Aim for water that feels comfortably warm to your skin—around 90–100°F.
The environment where you keep your starter matters, too. A cozy kitchen counter around 75°F is ideal. If your house is chilly, your starter may take longer to activate after feeding. In that case, find a slightly warmer spot to encourage activity. Just remember, you don’t want it to be too warm-that can kill the wild yeast!
When and How Often to Feed
Most potato flake sourdough starters are fed every 5–7 days. After feeding, let it sit out at room temperature for at least 8–12 hours but 24 hours will ensure it is active until. At that point, you can use it for baking or return it to the refrigerator until the next feeding.
If you bake frequently, you may choose to feed more often and keep the starter at room temperature. If you bake less often, once-a-week feedings from the fridge work just fine.
Common Mistakes to Avoid
Even though the feeding process is simple, there are a few pitfalls that can cause trouble:
- Using the wrong water temperature – Water that’s too hot can kill yeast, while cold water slows things way down. Aim for warm but not hot.
- Not feeding enough for the amount of starter – Always measure your starter first. If you underfeed, it won’t have the fuel it needs to stay bubbly.
- Feeding irregularly – Starters like consistency. Skipping feedings for weeks at a time can weaken or even kill it.
- Storing in metal containers – Acid from the starter can react with certain metals. Use plastic or preferably glass jars instead.
- Using flavored potato flakes – Buttered or seasoned flakes can disrupt fermentation. Stick with plain, unflavored flakes.
- Overfeeding too often – Adding too much “food” without letting the wild yeast catch up can weaken the starter.
By steering clear of these mistakes, you’ll save yourself frustration and keep your starter happy and healthy.
Sample Feeding Chart
| Starter Amount | Water | Sugar | Potato Flakes |
|---|---|---|---|
| ½ cup of starter | ½ cup | ⅜ cup | 1 ½ tbsp |
| 1 cup of the starter | 1 cup | ¾ cup | 3 tbsp |
| 2 cups starter | 2 cups | 1 ½ cup | 6 tbsp |
At the end of the day, feeding ratios are just about keeping your starter well-fed and happy. Once you figure out what works in your own kitchen, stick with it—you’ll have a strong starter ready whenever you need it.
I love seeing all of the delicious creations you make! Share a photo of your happy, bubbly starter over on instagram or facebook and give me a tag @littletennesseehome
Pin for later and share with a friend
Leave a Reply