
Potato flake sourdough pita pocket is an easy and fun bread to make. This recipe yields soft, delicious, fluffy pitas with perfect pockets ready to be filled with your favorite ingredients.
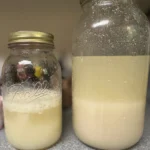
Use your potato flake sourdough starter to naturally rise this bread and allow it to ferment so that the grains are easier on the gut!
With a few simple tools and ingredients, you can enjoy the satisfaction of baking your own pita bread at home. I’m so excited to show you the process of making perfect pita pockets!

This post contains affiliate links through amazon, which means I may make a small commission at no extra cost to you. When you make a purchase through my link, you help me to keep Little Tennessee Home up and running! Thank you for your support! See my full disclosure here.
Tools You Will Need:
- Baking stone or cast iron griddle (a baking sheet will do in a pinch, but it doesn’t retain heat the same way, I can’t say for certain that you will achieve the puffed up pita with a baking sheet)
- Rolling pin: grab you one with thickness rings, I had no idea how much I would love having one like this!
- Dough scraper/cutter
- Stand mixer (optional but much easier to knead this way)
- Measuring cups and spoons
- Long metal spatula (super helpful for placing the pitas in the oven)
- Plastic wrap (for covering the rising dough, it’s not recommended to use a tea towel because the top of the dough can dry out)
Ingredients:
- Warm water
- Potato Flake Starter (active or discard)
- Sugar
- Salt
- Olive oil
- Whole wheat flour
- All-purpose flour
How to make a perfect potato flake sourdough pita pocket:
Mixing the Dough
Begin by adding all the ingredients to the bowl of a stand mixer. Using the dough hook, mix the ingredients until a dough ball forms.
Knead the dough on the lowest speed for about 5 minutes. The dough should be smooth but not sticky. If the mixture looks dry, add 1 tablespoon of water at a time. It’s important to achieve the right consistency for the dough to ensure the best texture for the pita pockets.

First Rise
Next, coat the inside of a large bowl with a little olive oil. Place the dough in the bowl, cover with plastic wrap, and place it in a warm place.
Allow the dough to rise until it has doubled in volume, which typically takes about 8-10 hours.
This long fermentation process is essential for developing the flavors and texture of the pita bread. The use of wild yeast in your starter contributes to a richer, more complex flavor compared to commercial yeast.

Preheating the Oven
The next day, (or evening, depending on what time of day you mixed up the dough) when the dough is ready, place your pizza stone or cast iron griddle in the oven and preheat to 500°F.
The baking stone needs to be very hot, so let it preheat for at least 30-45 minutes. Make sure to place it on the highest shelf setting that will still allow you to lay the pita dough on without burning yourself. This high heat is crucial for achieving the perfect puff in your pita pockets.
Shaping the Pitas
Now that your dough has risen and your oven is preheating, it’s time to shape the pitas. Divide the dough into 8 equal pieces. Shape each piece into a nice round ball.

Allow them to do a short “second rise” under a damp tea towel for about 30 minutes-1 hour, or just until puffy and soft. The damp tea towel prevents the dough from drying out.
After this rest time, press each dough ball flat.
If the dough is sticking too much, prepared a lightly floured surface. Roll each piece into a 6-inch round disc or 1/4 inch thick. Getting the thickness right is important; if the dough is too thick or too thin, it won’t puff up properly during baking.

Baking the Pitas
Carefully place two pieces at a time onto the preheated baking stone using a long metal spatula. Bake for 3-4 minutes.
The high heat will cause the pitas to puff up, creating that classic pocket. Using a long metal spatula can help you place the pitas on the hot surface without burning yourself.
Flip them over after they have puffed up and allow them to cook on the opposite side for about 1 minute, just to get a little color on that side. Remove from the oven, and repeat this process with the rest of the dough balls!

Tips for Perfect Pita Pockets
- Warm Water: Make sure the water you use is warm, not hot, or it can kill the potato flake starter.
- Olive Oil: Using olive oil not only adds flavor but also helps keep the dough smooth and manageable.
- Whole Wheat Flour: The addition of whole wheat flour adds a nutty flavor and extra nutrients to the pitas. I don’t recommend using bread flour for this recipe.
- Stand Mixer: While you can knead the dough by hand, a stand mixer with a dough hook makes the process much easier and more efficient.
- Hot Baking Surface: Ensure your baking stone or cast iron griddle is fully preheated to achieve the best puff. A cast iron skillet could be used in place of the griddle or stone, but you’ll likely only be able to cook one pita at a time.
Why Homemade Pita Pockets?
Making pita pockets at home has several advantages.
First, you have control over the ingredients, ensuring your pitas are free from preservatives and artificial additives.
Second, the flavor of homemade pita bread is far superior to store-bought versions, thanks to the fermentation process and the use of fresh ingredients.
Lastly, baking your own pita bread can be a fun and educational activity, especially if you involve your children in the process.

Ideas on using your pita bread:
Homemade pita pockets are incredibly versatile. Here are some serving ideas:
- Sandwiches: Fill your pitas with grilled chicken, fresh vegetables, and a dollop of hummus for a delicious and healthy sandwich.
- Pita Chips: To make pita chips, simply cut your baked pitas into triangles, brush them lightly with olive oil, and sprinkle with salt. Bake in a preheated oven at 375°F for about 10-12 minutes or until golden and crispy. These make for a perfect snack or appetizer when served with your favorite dips.
- Dips: Serve warm pita with dips like tzatziki or your favorite hummus.
- Salads: Stuff your pitas with a mix of greens, tomatoes, cucumbers, and feta cheese for a quick and satisfying salad wrap.
- Breakfast: Spread peanut butter and honey inside a pita for a simple yet nutritious breakfast.
- Pita pizzas: Turn your pita pockets into mini pizzas! Spread some pizza sauce over the pita, sprinkle with cheese, and add your favorite toppings. Bake in a preheated oven at 400°F until the cheese is melted and bubbly. This is a quick and easy meal that both kids and adults will love.
- Pita wraps: Use your homemade pitas as wraps for a quick and healthy lunch. Fill them with lean proteins like grilled chicken or falafel, fresh vegetables, and a tangy yogurt sauce. The soft and fluffy texture of the pita makes it an ideal wrap that holds all your fillings perfectly.
Storing and Reheating
To keep your pita pockets fresh, store them in an airtight container at room temperature for up to two days.
For longer storage, place them in a zip-top bag and freeze for up to three months. To reheat, wrap the pitas in foil and warm in a preheated oven at 350°F for about 10 minutes.
You could also wrap them in a damp tea towel and microwave them until warm. About 15-20 seconds per pita.

Troubleshooting Tips for Potato Flake Sourdough Pita Pocket
If your pitas don’t puff up, here are a few things to check:
- Dough Thickness: Ensure the dough discs are rolled out to the right thickness (1/4 inch). Too thick or too thin will affect the puff.
- Oven Temperature: Make sure your oven and baking stone are fully preheated to 500°F.
- Moisture Level: If your dough is too dry, it won’t puff up properly. Add water a tablespoon at a time during mixing if needed.
- Even Heating: Use a baking stone or cast iron griddle for even heat distribution.
Health Benefits of Homemade Pita Bread Using a Potato Flake Starter
Making pita bread at home not only ensures better taste and texture but also offers several health benefits:
- No Preservatives: Homemade pita bread is free from preservatives and artificial additives, making it a healthier option compared to store-bought varieties.
- Control Over Ingredients: You can choose high-quality ingredients, such as whole wheat flour and extra virgin olive oil, to make your pita bread more nutritious.
- Fermentation Benefits: The long fermentation process using a sourdough starter can improve the digestibility of the bread and enhance its nutritional profile.
- Lower Sodium: Homemade pita bread can have lower sodium levels compared to commercially produced bread, which is often high in salt.

Personalizing Your Potato Flake Sourdough Pita Pocket
Once you’ve mastered the basic recipe, don’t hesitate to get creative and personalize your pita bread. Here are some ideas to inspire you:
- Herbed Pita: Add dried herbs like oregano, thyme, or rosemary to the dough for an aromatic and flavorful twist.
- Garlic Pita: Mix minced garlic into the dough for a delicious garlic-infused pita bread.
- Cheese Pita: Sprinkle some grated cheese on top of the dough before baking for a cheesy variation.
- Sweet Pita: For a sweet treat, add a touch of cinnamon and sugar to the dough and bake as usual.
Making pita pockets at home is a rewarding and delicious experience. With a few simple tools and ingredients, you can create soft, fluffy pitas with perfect pockets ready to be filled with your favorite fillings.
- Potato Flake Sourdough Starter Feeding Ratios
- Potato Flake Sourdough Chocolate Chip Muffins

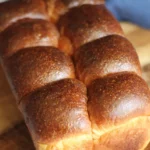
- Potato Flake Sourdough Brioche
- Potato Flake Sourdough Chocolate Zucchini Muffins

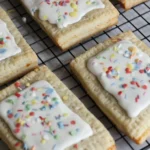
- Potato Flake Sourdough Strawberry Pop Tarts
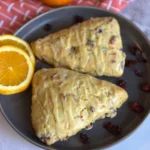
- Potato Flake Sourdough Orange Cranberry Scones
By following this step-by-step guide, you’ll be able to enjoy the taste and satisfaction of homemade pita bread. Whether you’re serving them with dips, using them for sandwiches, or making pita chips, homemade pita pockets are a versatile addition to any meal.
Pin for later and share with a friend:

Give this recipe a try and enjoy the wonderful flavors of freshly baked pita bread! Not only will you impress your family and friends with your baking skills, but you’ll also enjoy the health benefits and superior taste of homemade bread.

Easy Potato Flake Sourdough Pita Pocket
Equipment
- Baking stone or cast iron griddle
- Rolling Pin
- Dough scraper/cutter
- Stand mixer (optional but much easier to knead this way)
- measuring cups and spoons
- Long metal spatula (super helpful for placing the pitas in the oven)
- Plastic wrap (for covering the rising dough, it's not recommended to use a tea towel because the top of the dough can dry out)
Ingredients
- 3/4 cup warm water
- 1/2 cup starter active or discard
- 1 teaspoon sugar
- 1 teaspoon salt
- 2 tablespoons olive oil
- 3/4 cup whole wheat flour I scoop and shake to level my flours
- 2 cups all-purpose flour
Instructions
- Begin by adding all the ingredients to the bowl of a stand mixer. Using the dough hook, mix the ingredients until a dough ball forms.
- Knead the dough on the lowest speed for about 5 minutes. The dough should be smooth but not sticky. If the mixture looks dry, add 1 tablespoon of water at a time. It’s important to achieve the right consistency for the dough to ensure the best texture for the pita pockets.
- Next, coat the inside of a large bowl with a little olive oil. Place the dough in the bowl, cover with plastic wrap, and place it in a warm place.
- Allow the dough to rise until it has doubled in volume, which typically takes about 8-10 hours.
- The next day, (or evening, depending on what time of day you mixed up the dough) when the dough is ready, place your pizza stone or cast iron griddle in the oven and preheat to 500°F.
- The baking stone needs to be very hot, so let it preheat for at least 30-45 minutes. Make sure to place it on the highest shelf setting that will still allow you to lay the pita dough on without burning yourself. This high heat is crucial for achieving the perfect puff in your pita pockets.
- Now that your dough has risen and your oven is preheating, it’s time to shape the pitas. Divide the dough into 8 equal pieces. Shape each piece into a nice round ball.
- Allow them to do a short “second rise” under a damp tea towel for about 30 minutes-1 hour, or just until puffy and soft. The damp tea towel prevents the dough from drying out.
- After this rest time, press each dough ball flat.
- If the dough is sticking too much, prepared a lightly floured surface. Using your rolling pin, roll each piece into a 6-inch round disc or 1/4 inch thick. Getting the thickness right is important; if the dough is too thick or too thin, it won’t puff up properly during baking.
- Carefully place two pieces at a time onto the preheated baking stone using a long metal spatula. Using a long metal spatula can help you place the pitas on the hot surface without burning yourself.
- Bake for 3-4 minutes. The high heat will cause the pitas to puff up, creating that classic pocket.
- Flip them over after they have puffed up and allow them to cook on the opposite side for about 1 minute, just to get a little color on that side.
- Remove from the oven, and repeat this process with the rest of the dough balls!
Leave a Reply